User's guide
This is the user's guide for 2c8 Modeling Tool. It starts with descriptions of commonly used terms and the structure of the application. The rest of the guide describes all available functionality and its intented use.
The main purpose in 2c8 Modeling Tool is to create graphic models that can be published as web pages. The models are stored in one or more repositories, either locally on your computer or on a shared server. This chapter describes some of the terms that are most commonly used throughout this manual.
| Repository | All the models you are working with are stored in one or more repositories. Repositories clearly divide your data in the sense that data from one repository can not refer to data in another repository. This means that when you open a repository there is no way you can affect what has been done in another repository. |
| Workspace | A repository has one or more workspaces. By default there is only one workspace in a repository and if you do not wish to use version management for your models you do not need to care about workspaces at all. |
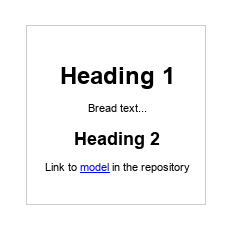
| Model | A model is a graphic representation of some kind. It could describe for example a business process or an organisation. The model contains a set of symbols and relations between these that together makes up the content of the model. In addition to the visual content you can also connect describing texts and links to documents directly on the model. |
| Object | An object describes some kind of entity that can be a part of a model. It could be for example a business object, an activity or an individual. The available object types in a model depends on the type of model you are working with. One important aspect to understand is that the same object can be a part of more than one model, and that a change to this object will be reflected in all of the models. This is one of the strengths of 2c8 Modeling Tool compared to simpler drawing tools, but can lead to some confusion if you have not understood this. |
| Symbol | When you place an object in a model it is represented by a symbol. All the object's data such as its title, description and documents belong to the object itself and will therefore be the same regardless of which model the object is shown in. The appearance of the symbol on the other hand can be changed without having the changes show in other models where the object is used. The symbol's size, position, color and font settings are all examples of settings that only affects the appearance of the symbol and not the object itself. |
3.1 Login
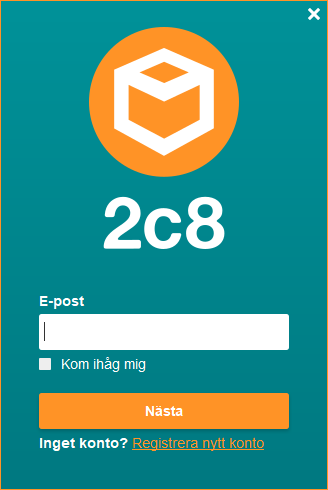
When starting 2c8 Modeling Tool you will see a login prompt. Use your email address and the password you set when you activated your account. An activation mail is sent to you when an administrator user in 2c8 Portal has added you as a user of the product 2c8 Modeling Tool.
3.2 Repository manager
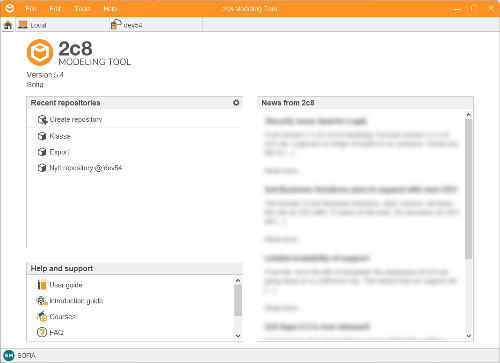
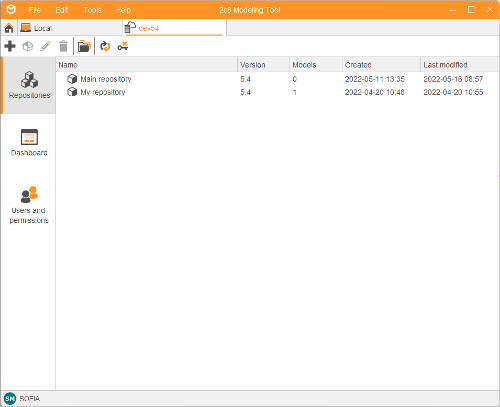
Once you are logged in, 2c8 Modeling Tool will start. The first thing you will see is the repository manager. Here, you can see the latest repositories opened by you, news from 2c8, and links for help and support. Under the menu row, you can find two tabs: "Lokal" and "Server" (or your server name). These tabs are available data sources where repositories are stored locally on the user's computer or a server. If you have multiple servers within your organization, you will see more server tabs. .
3.3 Workspace
When you open a repository (workspace) to work in it another view is shown. This view is customized for creating and editing data in a repository and has four main parts: the menu bar, the navigation bar, the editing view and the status bar.
3.3.1 Menu bar
The menu bar contains basic functions for a repository divided into a number of sub menus.
| File | Options for creating and opening models, close opened models, export/import models and closing the workspace. |
| Tools | Options for publishing models and managing languages, color profiles etc. This menu also provides access to the application settings. |
| Show | Options that affect the user interface. |
| Help | Help and support together with information about the application and the license used to run it. |
3.3.2 Navigation bar
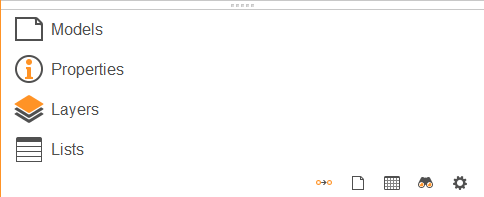
On the left side is a navigation bar where only one panel at a time can be active. The panels available can differ somewhat given which extensions to the program are currently installed. By dragging the divider under the currently active panel you can control the number of panels showing. The remaining panels will be shown as small icons at the bottom.
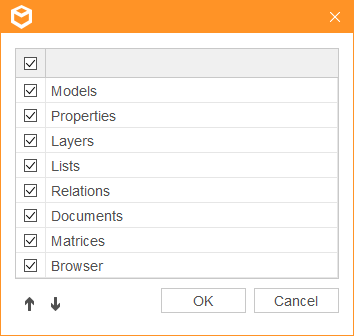
By clicking the gear at the bottom right corner you can hide panels completely if you are not using them. You can also change the order of the panels under »Navigation bar settings«
You can hide the navigation bar in order to get more room for modeling by choosing »Show/Show navigation bar« in the menu. You can also use the keyboard shortcut »Ctrl+H«.
3.3.3 Editing view
The editing view contains a number of tabs for editing data in a repository, most commonly models. When a model is opened it is shown in a new tab in the editing view. Some other data types such as lists are also opened in tabs such as these.

When you open a workspace the first tab shown is a start page that provides easy access to common functions and help and support. You can also open recently opened models and see the same news feed as on the repository manager start page.
The second tab is a browser view which can be used for finding content in the repository and performing actions on the results. This is covered in the chapter Browser
3.3.4 Status bar
The status bar is used to show the current user, repository and currently active language (see Languages). It can also be used to show ongoing tasks that are performed in the background.

The repository manager is the first window shown when the application is started. By default a start page is shown together with a tab showing repositories that are stored locally on disk.
4.1 Start page
When the application is started a start page is shown that provides easy access to common functions and the most recently opened repositories.
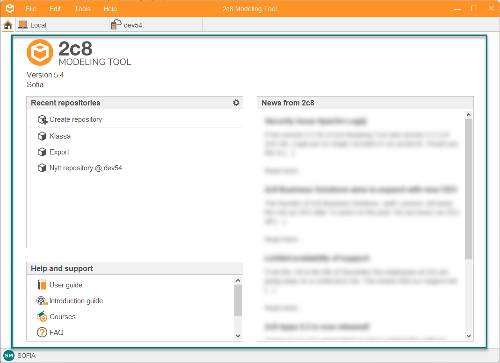
| Recent repositories | Provides a shortcut to create a new repository and links for directly opening the most recently opened repositories. |
| Help and support | Shortcuts for getting help and support. Provides a link to this guide and links for showing instructional videos available online. You can also get a list of the available keyboard shortcuts and information about how to contact us at 2c8 for support. |
| News feed | To the right you can see a news feed with recent news from 2c8. If your company has chosen to connect your own news feed to the license key then this will be shown below the news from 2c8. |
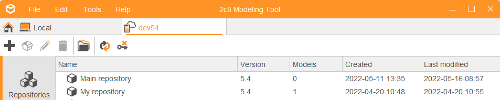
4.2 Repository tables
To the right of the start page there are one or more tabs containing tables with repositories from different data sources. Each row in the table shows information about a repository and has the following columns:
- The name of the repository
- Number of models
- Which versions a repository can be opened in. If you try to open a repository from an earlier version you will be able to choose whether to upgrade it to the current version. Note that after this is done you will no longer be able to open it in earlier versions of the application.
- The date when the repository was created.
- The date when the latest change to the repository was made.
4.3 Creating a new repository
Before you can start creating models you have to create at least one repository. You do this in one of the following ways.
- Choose »Create repository« from the start page.
- Choose »File/Create repository...« from the menu.
- Click the »Create repository...« button in the toolbar.
- Right click the empty area of the repository table and choose»Create repository...«
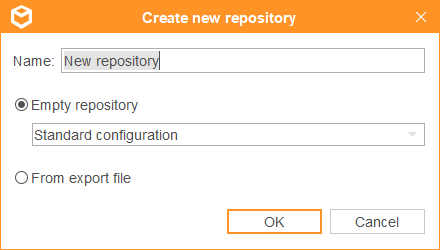
First enter a name for the new repository. Then choose if it should be an empty repository. This is the default selection and creates a new repository without any models. For an empty repository you also have the option of choosing a repository configuration. The configuration controls the available content in the repository, such as the set of available model types and object types. The standard configuration allows all model types and symbol types but puts some restrictions on which object types can be placed in which model types. If you do not want any restrictions you can choose »Extended configuration«.
If you have access to an export file created from another repository you can choose to create the repository from this export file instead. A new repository will be created and all its content will be imported into the new repository. You do not need to chose a configuration since this is included in the export file.
If you are working against a server you might not have sufficient permissions to create new repositories, see Permission groups in a repository.
4.4 Open a repository
To start creating models you first need to open the repository you wish to work in. You do this in one of the following ways:
- Select a repository and choose»File/Open repository« from the menu.
- Select a repository and click the »Open repository« button in the toolbar.
- Right click a repository and choose »Open repository«.
- Double click a repository.
When a repository is opened the repository manager is closed and the editing view is opened. If there are more than one unlocked workspace in the repository the editor for workspaces will be shown instead, letting you choose which workspace to open (see Workspaces and archives).
4.5 Rename a repository
You can rename a repository at any time as long as there are no other repositories with the name you wish to change to. You do this in one of the following ways:
- Select a repository and choose »Edit/Rename repository«from the menu.
- Select a repository and click the »Rename repository...« button in the toolbar.
- Right click a repository and choose »Rename repository...«.
If you are working against a server you might not have sufficient permissions to rename repositories, see Permission groups in a repository.
4.6 Remove repositories
You can remove one or more repositories permanently in one of the following ways:
- Select repositories and choose »Edit/Remove repositories...« from the menu.
- Select repositories and click the »Remove repositories...« button in the toolbar.
- Right click a repository and choose »Remove repositories...«.
If you are working against a server you might not have sufficient permissions to remove repositories, see Permission groups in a repository.
4.7 Refresh view
You can click the »Refresh view« button in the toolbar to refresh the list of repositories from the data source. This is mostly useful when working against a server where other users might have done changes since the list of repositories was loaded.
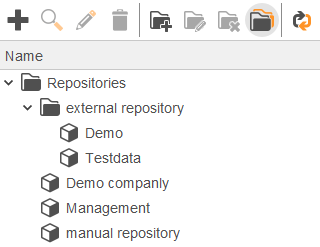
4.8 Folder view
The folder view makes it easier to organise your repositories by creating folders and sub folders that repositories can be placed in. To enable or disable folder view you click the »Folder view on/off« button in the toolbar. To move a repository between folders drag it and drop it in the new folder.
4.8.1 Creating a folder
There is a number of ways to create new folders. Regardless of which way you choose the new folder will be created under the currently selected folder. If no folder is selected the new folder will be created under the root folder.
- Choose »File/Create folder...« from the menu.
- Click the »Create folder...« button in the toolbar.
- Right click a folder and choose »Create folder...«
If you are working against a server you might not have sufficient permissions to create folders, see Permission groups in a repository.
4.8.2 Rename a folder
You can rename a folder at any time as long as there is no other folder or repository with the same name as the new name. You do this in one of the following ways:
- Select a folder and choose »Edit/Rename folder...« from the menu.
- Select a folder and click the »Rename folder...« button in the toolbar.
- Right click a folder and choose »Rename folder...«.
If you are working against a server you might not have sufficient permissions to rename folders, see Permission groups in a repository.
4.8.3 Remove a folder
There are more than one way to remove an existing folder. They all have in common that in order to remove a folder it cannot contain any repositories.
- Select a folder and choose »Edit/Remove folder...« from the menu.
- Select a folder and click the »Remove folder...« button in the toolbar.
- Right click a folder and choose »Remove folder...«
If you are working against a server you might not have sufficient permissions to remove folders, see Permission groups in a repository.
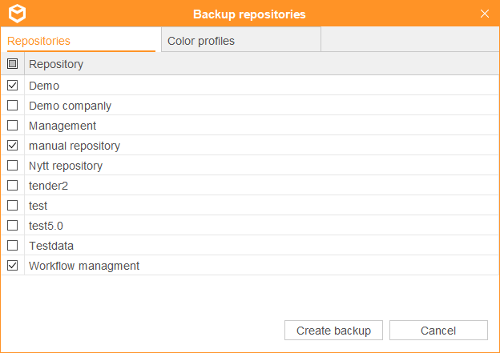
4.9 Backup and restore repositories
When the view for local repositories is active you have the option of backing up and restoring repositories. To create a new backup file you choose »Tools/Backup repositories...« from the menu. Then choose which repositories you wish to include in the backup file.
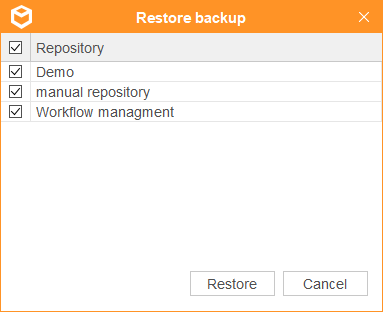
To restore repositories from a backup file you choose »Tools/Restore repositories...«. When you have chosen the backup file you get to choose which repositories to restore. You can double click the repository name here to give it another name when it is restored.
The application includes a demo repository containing a few models that demonstrates common uses of some of the model types. To read this repository back when it is not in the list you choose »Tools/Restore demo repository« from the menu.
4.10 Access server
Since you've already logged in to 2c8 Modeling Tool, you have automatic access to the servers you've been assigned in 2c8 Portal. Click on the tab "Server" (or your server name) to see your repositories stored on the server. The first thing you will see once connected to the server is the repositories on the server. To the left, you can change between the views »Repositories«, »Dashboard«, and »Users and permissions«.
4.11 Help menu
The menu »Help« contains information about the application and your license activation. It also contains options for getting help and support.
| User guide | Opens this guide. |
| Shortcuts | Shows available keyboard shortcuts that can be used in the application. |
| Support | Shows information about how to contact us at 2c8 for support. |
| System requirements | Opens a document describing the system requirements of the product. |
| License key | The license key for 2c8 Modeling Tool is made up of a string of numbers and is unique to a company. Each user makes a unique activation of this license key with name, email address etc. Here you can see the information available about both the key and your unique activation. |
| About | Shows information about the application such as the current version. |
| Documentation for extensions | If you have installed extensions that come with their own documentation links then this documentation will also be shown in the help menu. |
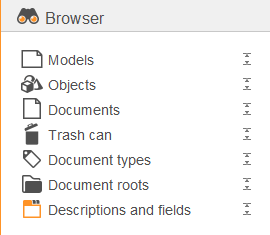
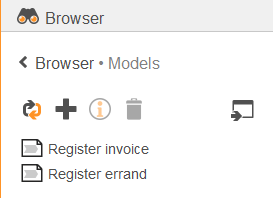
The browser views in 2c8 Modeling Tool are used to search for content in a repository, and to perform actions on the results. Next to the »home« tab there is a search tab that is pinned in place. This can be used to quickly search for any kind of data in the repository. Searches that are performed often can be saved as lists that are always available in the »Lists« sidebar. There is also a »Browser« sidebar that contains predefined lists.
5.1 Browser sidebar
The browser sidebar contains predefined lists for all different content types. These list all of the available content of a given type in the repository. In addition to these there are two lists that are customized for specific applications:
The »Trash can« list shows all objects that are not used in any models, and raises the priority of the remove action. This makes it easy to quickly find and remove objects that are no longer in use.
The »Workflow« list will be available if you are connected to a server and workflow is enabled (see Maintenance). It lists all of the models in the repository, with maintainers, reviewers and approvers added as columns in the result. It also raises the priority of actions for setting the workflow responsibility for models. This replaces the workflow matrix in previous versions as the number one way to manage workflow. If you liked the overview of the workflow matrix you can still create a similar custom matrix that shows the workflow responsibility for all models in the repository (see Matrices).
Note that the lists available in the browser sidebar can never be overwritten. You can however open the list, make changes to it and copy it to a new list that can later be found in the »Lists« sidebar.
The default action when double-clicking a list in the browser sidebar is to open the result in the search tab. You can also click the icon at the right of the list row to view the results directly in the sidebar. This will show the results of executing the list together with a few selected actions that can be performed directly from the sidebar. The same functionality is available in the »Lists« sidebar. Finally if you have a list that is used frequently you can right-click it and choose »Pin to sidebar«. This list will now be added as its own sidebar that is always available when you open the repository.
5.2 Search view
The search view is shown when opening the search tab, opening a predefined list or opening a custom list from the »Lists« sidebar. It consists of three parts: a toolbar with actions, a set of filters that determines the result and a result view that shows the resulting data. For predefined lists the filter components is shown directly when opening the list. For custom lists the toolbar contains an »Edit« action that is used to edit the filter settings and title of the list.
5.2.1 Toolbar actions
The actions are divided into two sections, one for actions relevant to the list itself and one for actions that can be performed on the list results.
The list actions are:
| Refresh | Refreshes the results based on the current filters. Note that the list will be automatically updated when the filters change, but this might still be needed in some cases, for example when other users have made changes to the data remotely. |
| Reset | Resets the lists to an unedited state. A predefined list will be reset to its default state if changes have been made. A custom list will be reset to the last state where it was saved. The search tab will default to listing all the objects in the repository without filters. |
| Copy to list | This is shown for predefined lists and lets you copy the current filter settings to a new list in the repository. |
| Edit | This is shown for custom lists and lets you edit the title and filter settings of the list. |
The result actions differ between the different types of data that can be listed. All of these actions are described in the relevant chapters for the corresponding data types, see for example Model browser actions and Object browser actions. Most of the actions will require that you select one or more rows from the result set and then apply the actions to this selection.
5.2.2 Filters
In its default state a list shows all of the content of a given type. You then apply filters to narrow the results down. The available filters are based on the type of content being listed. All filters are described in the relevant chapters for the corresponding data types, see for example Model browser filters and Object browser filters.
There are a few filters that are common to almost all types of lists:
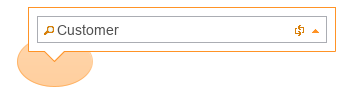
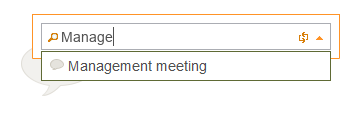
| Title filter | The first filter in the search view is a text field that filters out rows where the title contains the text entered. |
| Type filter | The next filter determines the type of the content being listed, for example models or objects. Note that this filter is not available for lists from the browser sidebar, where the type is predefined. Some high-priority filters will be shown directly in the filter section of the search view, and the rest can be added by clicking the new filter button. |
In previous versions of 2c8 Modeling Tool lists were created by describing relations between objects in models. These types of lists can still be created by using the filter »Relations« for lists of type »Models«, »Objects« or »Documents«. See the chapter Relation filters and custom relations for more information about this filter type and how to create custom relations between objects.
5.2.3 Result view
The results of the current filters is shown in the result view. Each row shows an entity that matches all of the filters. You can choose which columns to show by using the column drop-down at the right side of the result view. There is a set of predefined columns available for each result type, and for models and objects any custom field types can also be shown.

In addition to the actions in the toolbar, for most result types the title can be edited directly in the result view. Select a row by clicking the title and then press F2 or click once more to start editing the title.
5.3 List sidebar
The list sidebar behaves much the same as the browser sidebar, but it shows all custom lists that have been saved from browser selections. The list bar differs in that there are a few actions available in the toolbar:
| Create list | Creates a new list that by default lists all objects. This can then be edited to a custom selection and saved as a new list. |
| Remove lists | Removes the currently selected lists. |
| Copy list | If you need to create a new list based on an existing list without editing the existing one you can select a list and create a copy of it. A new list will be created with the same filter settings as the copied one. |
| Refresh | Refreshes the lists, in case lists have been added, edited or removed remotely. |
The main purpose of 2c8 Modeling Tool is to create and publish business models. This chapter shows you how to create and work with models in 2c8 Modeling Tool.
6.1 Models sidebar
All the models in a workspace are shown in a panel in the navigation bar.
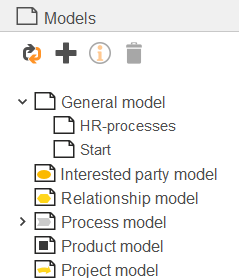
Each model type has a node in the tree that contains all available models of that type, sorted by name. If there are breakdowns from a model to other models and the setting to »Show breakdowns« (gearweel in the right hand corner) is enabled you can follow these by navigating »down« in the tree (see Breakdowns). A side-effect of this behavior is that the same model might occur at multiple locations in the tree.
6.2 Create new model
There are more than one way to create a new model in 2c8 Modeling Tool:
- Choose »File/New model...« from the menu.
- Use the keyboard shortcut »Ctrl+N«.
- Right click a model type in the tree and choose »Create new model«.
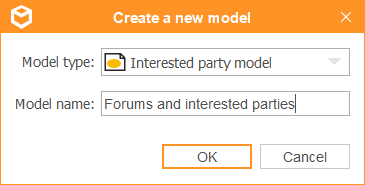
When you create a new model you get to choose the type of model and give it a name. If you created the model by right clicking a type in the tree this type will be preselected. When the model has been created it is opened for editing in a new tab in the editing view.
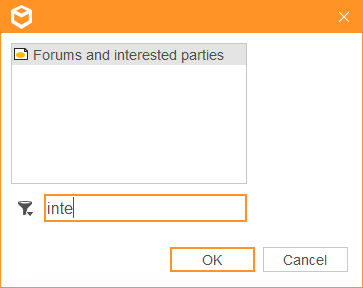
6.3 Open a model
To open an existing model you can double click it in the tree or right click and choose »Open«. If you do not know where the model is in the tree you can also open it by choosing »File/Open model...« from the menu or use the keyboard shortcut »Ctrl+O«. This will show a new window listing all available models. Filter the list by entering a part of the model name and then open the model by selecting it and clicking »OK«, double clicking it or pressing »Enter«.
6.4 Rename a model
To rename a model you right click it in the tree and choose »Rename«. Then enter the new model title.

6.5 Change model type
To change the type of a model you right click it in the tree and choose »Change type«. The sub-menu shows all types that this model type can be changed to.
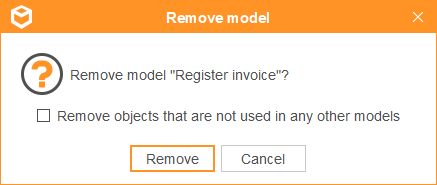
6.6 Remove a model
To remove a model from the workspace you right click it in the tree and choose »Remove«. Optionally you can choose to also remove any objects in the model that are no longer used in any models.
6.7 Edit a model
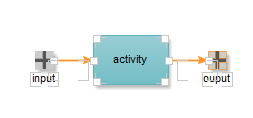
When you open a model it is shown in the editing view. The editing view consists of a toolbar and a modeling area. The toolbar has buttons for common functions together with buttons for placing the available object types and relation types in the model. The modeling area shows the graphical representation of the model, consisting of symbols and relations between these. All changes made to the model are saved automatically so you never have to worry about manually saving your changes.
6.7.1 Add symbols
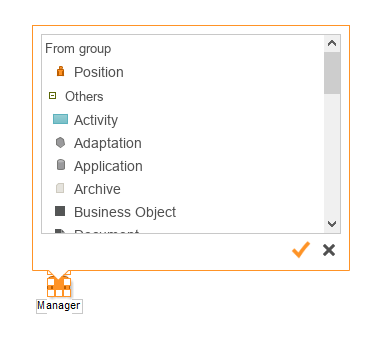
To create a new object and add it to the model you choose one of the object types from the toolbar and click somewhere in the model. You can also use the number buttons 0-9 on your keyboard to quickly choose a type based on its position in the toolbar. Pressing the same button multiple times will toggle between the available types within a group. When you have entered a title for the new object in the popup you click somewhere outside it or press »Enter«. The object is created and a new symbol is created for it and placed in the model.
You can also add a new symbol for an existing object. Start by adding it the same way as a new object. When you start entering the title of the object you will get a list of objects matching this title. If you choose one of the objects in the list this object will be reused instead of creating a new one.
6.7.1.1 Quickdraw
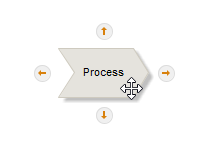
If »QuickDraw« has been enabled in the toolbar then there is a quicker way to build a model from its existing symbols. When you hover with the mouse above one of the symbols in the model you can see arrows appearing in the directions where the program has suggested relations available. Move the mouse above one of the arrows to see the suggested object types to place in this direction. When you click one of them and enter a title a new object of this type will be created.
The new symbol is placed at a fixed distance from the source symbol in the correct direction and a new relation of the recommended type is created to it.
You can also use the keyboard shortcuts for Quickdraw. Use »Ctrl+arrow keys« to move the selection and then »Ctrl+Shift+arrow keys« to add a new symbol in a given direction. Press multiple times to toggle between the recommended types in that direction.
6.7.1.2 Add multiple symbols
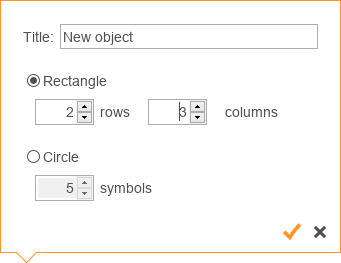
You can add multiple objects at once by choosing a type and then clicking and dragging across an area in the model. The popup that shows lets you enter a title and suggests how many symbols to place, based on the default size of the symbol type and the size of the area.
6.7.1.3 Fill
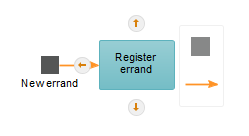
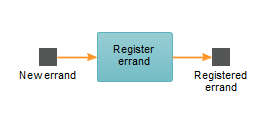
The »Fill« function lets you automatically place symbols and relations between two existing symbols. The function is only available in certain model types and between certain object types. For example, in a process model you can select two business objects, right click and choose »Fill« to add in-between activities and business objects. The number of created objects is based on the distance between the selected symbols.
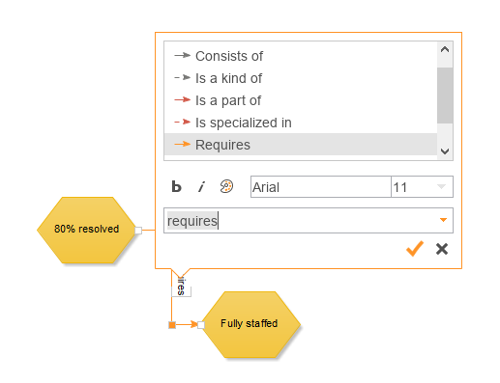
6.7.2 Add relations
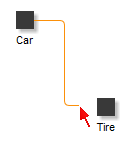
To add a new relation between two symbols you choose »Relation (R)« in the toolbar and click the symbol you wish the relation to start from. You then click the other symbol to create the relation. You can also click the empty area of the model to control the way the relation takes by adding new control points.
You can create relations from one symbol to multiple others with one operation. Just click the »start« symbol and then click and drag around all the »end« symbols. The new relations will automatically get the recommended types.
6.7.3 Select symbols and relations
All editing of symbols and relations are based on the current selection. There is a number of ways to control which symbols and relations that are part of the current selection:
- Click on a symbol or relation to select this and deselect everything else.
- Drag around an area to select everything within it.
- Press »Shift« while selecting to add or remove symbols and relations to/from the selectionl.
- Use »Ctrl+arrow keys« to change selection based on direction in the model. This only works when a single symbol is selected.
- Use »Ctrl+A« to select everything.
- Click somewhere in the model to deselect everything.
6.7.4 Remove symbols and relations
To remove symbols and relations you select them and do one of the following:
- Click the »Remove« button in the toolbar.
- Right click the selection and choose »Remove«.
- Press »Delete« on the keyboard.
Note that only the symbols and relations will be removed and not the objects. You can add new symbols and relations using the same objects but you will loose any appearance settings that was made to the old symbols and relations.
6.7.5 Edit symbols
This section covers the different ways you can edit a symbol in the model. Most settings affects only the symbol and not the underlying object, but some of them will affect the object as well and could thereby have effect on other models as well.
6.7.5.1 Size and position
To move a selection you drag it with the mouse. If you drag in one of the corners of the selection you will resize the symbols instead. You can also move the selection by using the arrow keys on the keyboard. Hold »Shift« down to move the selection one pixel at a time for finer control of the placement.
6.7.5.2 Title and font
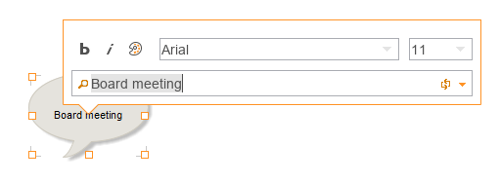
To change the title of an object you can double click the symbol, right click it and choose »Edit label«, or use the keyboard shortcut »F2«. If you click the arrow at the right side of the title popup you can also change the font and color of the text. Note that the title is an object setting which will affect all models where the object is used, while the font settings will only affect the currently selected symbol.
A list of matching objects will be shown when you edit the title in the same way as when you add a new object. You can select an object in the list to switch to another object instead of renaming the current one. The old object will still exist and you can place a new symbol for it later in the current model or in another model.
To change the size and position of the label you press »Ctrl« on the keyboard and then position and resize it the same way you would a selected symbol.
6.7.5.3 Set default size
Each object type has a standard size. To reset symbols to their standard size you right click them and choose »Set default size«.
6.7.5.4 Constrain proportions
By right clicking a symbol and choosing »Constrain proportions« you can make sure that the width to height ratio of the symbol remains constant when the symbol is resized. You can also get this behavior temporarily by holding »Shift« down when resizing symbols.
6.7.5.5 Center align label
The label of a symbol can be moved and resized independently of the symbol. By right clicking the symbol and choosing »Center align label« you can keep the text centered within the symbol. It will keep centered as long as you do not manually move or resize the label.
6.7.5.6 Show label
By right clicking and choosing »Show label« you can hide or show the label for a symbol. This can be used in cases where for some reason you do not wish to see the title directly in the model. This is better than setting an empty title since this makes the object difficult to find and tell apart from other objects when searching for it in other parts of the application.
6.7.5.7 Appearance
By right clicking a symbol and choosing »Appearance« you can change the color and border of a single symbol.
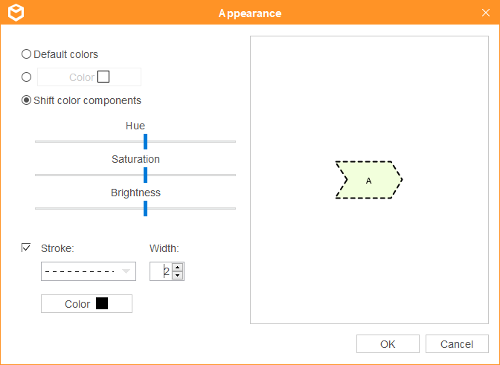
| Default colors | Use the default colors. |
| Choose a color | Sets a single color on the symbol. This will remove all color gradients and can make the symbol look flat. |
| Shift color components | Shifts the hue, saturation and brightness of the colors based on the original colors of the symbol. This choice keeps all gradients and therefore looks better than setting a single color, but it can be tricky to get the correct result. |
| Border | You can set a border for a symbol by choosing a stroke type, stroke width and stroke color. |
6.7.5.8 Image
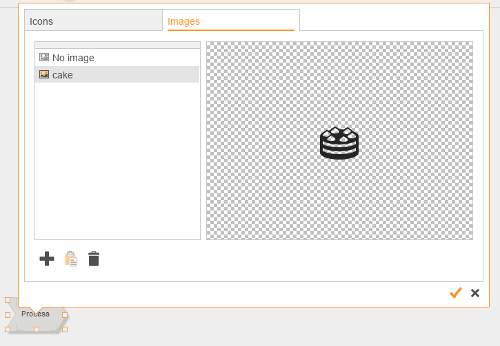
If you wish to you can replace the default appearance of a symbol with an image. Right click the symbol and choose »Image«. In the popup shown you can see the images available in the repository. You can create new images by clicking the browse button or by dragging image files from the file explorer. You can also use the button for pasting from the clipboard if you have previously copied an image from somewhere else. When you have selected the image to use for the symbol you can use the »Set default size« function to set the correct size of the symbol based on the image size.
6.7.5.9 Show symbol as frame
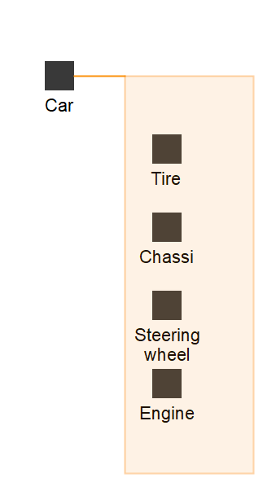
By using this setting you can make individual symbols in the model act as »frames« that can contain other symbols and have automatic relations created to the contained symbols. This behaves in the same way as swimlane models, see Swimlane models.
6.7.5.10 Order
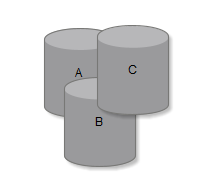
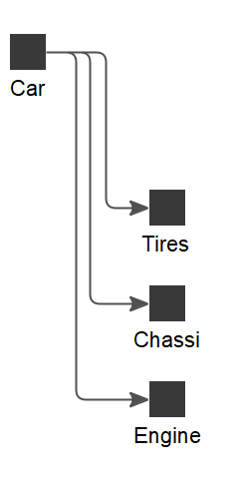
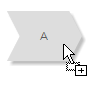
When right clicking a symbol the sub menu »Order« contains options for controlling the depth order of selected symbols, i.e. the drawing order of the symbols. The figure below shows three symbols »A«, »B« and »C«. If you select »A« and choose »Move forward« the symbol will be placed between »B« and »C«. If you instead choose »Move to front« it will be placed above both of the other symbols. The options »Move backwards« and »Move to back« work in the same way but in the opposite direction.
6.7.5.11 Freeze
Sometimes it can be useful to lock symbols in order not to move them by mistake. One common use case is to use one symbol as a »background« for other symbols. In these cases you do not wish to be able to create relations to the background symbol since this makes it impossible to create control points between the symbols on top of it. A frozen symbol behaves like it did not exist in the model with the exception of selecting it and a few operations that can be performed on frozen symbols. When a frozen symbol is selected it is indicated with a blue border. To freeze one or more symbols you select them, right click and choose »Freeze« or use the keyboard shortcut »Ctrl+F«. Do the same again to unfreeze the symbols.
Note that freezing symbols will affect the published models as well. As long as the symbol is frozen you will not be able to select it and get information about the object in the published web pages.
6.7.5.12 Holder
When you place symbols above other symbols it can be useful to be able to move all symbols as a group. In these cases you can choose the underlying symbol, right click it and choose »Holder«. When a holder symbol is moved all symbols that lies within its bounds will be moved as well.
6.7.5.13 Set/remove model as home
Since an object can exist in multiple models it can be useful to be able to designate one model as the »home« of the object. You do this by right clicking it and choosing »Set model as home« or »Remove model as home«. The ownership is used by the application whenever a single model is needed as a context for an object. One example is the published web pages where the only way to show information about an object is to open a model which the object is a part of. If a model has been designated as the »home« of the object then this model is the one that will be opened when clicking a link to the object. If no home model has been set then one of the models will be opened but which one it will be is undefined.
6.7.5.14 Change object type
You can change the type of an object by right clicking it and choosing »Change object type...« or by using the keyboard shortcut »X«. This is a change of the object and will therefore affect all models which it belongs to. Since different object types have different appearances it might look strange in other models if you have created relations to the symbols that now gets a new type. For this reason it is always a good idea to right click the symbol and take a look under »Participates in« to see which other models this object is used in. If you open these models you can see if any changes need to be made after changing the object type.
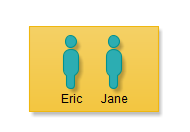
In the popup shown when changing the type you can see the types you can change to. At the top you can see the types within the same »group«, followed by all other types. In some cases such as in the example below with »individual« you only change between different alternative appearances of the same object type, i.e. the type is still »individual« but the appearance can be switched between a woman and a man.
6.7.6 Edit relations
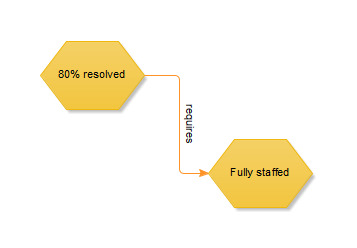
A relation is always drawn between two symbols and the appearance of the relation is determined by a number of control points placed along its path. When you publish models to the web you can see the relations that objects have to other objects, regardless of whether you are in the model that has the relation or not. You can also create lists and custom relations that use the relations to describe more complex relations between objects (see Relation filters and custom relations).
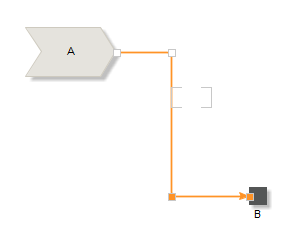
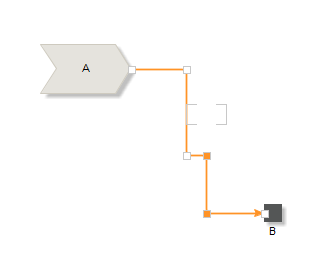
6.7.6.1 Control points
A relation is defined by its control points. The points divide the relation into one or more segments. Every time you select a relation you actually select a specific segment of the relation. You can then drag the segment with the mouse or move it with the arrow keys on the keyboard. If you move the first or last segment then new control points will automatically be created when needed.
You can also drag a single control point to move it. This will move both of the segments at that control point.
To manually add a control point you right click somewhere on a segment and choose »Add control point«. Two control points will be added, one where you clicked and one extra to still be able to draw the relation correctly. You can then drag the newly created segments to make the relation look the way you want to.
You can clear the current control points and reset them to default ones by right clicking the relation and choosing »Clear control points« or by using the keyboard shortcut »Alt+Shift+C«.
To align segments that are close to each other you can select the symbols that the relations are connected to and press »Space«.
6.7.6.2 Title and font
To edit the title of a relation you either double click the label, right click the relation and select »Edit label« or use the keyboard shortcut »F2«. If you click the arrow to the right in the popup shown you can also edit the font and text color of the relation label.
To edit the size and position of the label you press »Ctrl« and click the label. You can then change the size and position in the same way as for a symbol. If the relation does not have a title you can select the relation to see where the label is, it will be drawn as part of the selection.
6.7.6.3 Appearance
Under »Appearance« you can change the appearance of the relation by choosing line type, width and color.
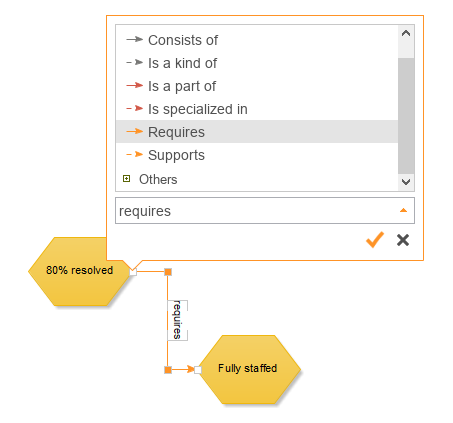
6.7.6.4 Change relation type
To change the type of a relation you right click the relation and choose »Change relationship type...«. You can also use the keyboard shortcut »X«. The popup shown is the same that is used to edit the title but lets you choose type as well. The recommended types are shown at the top followed by all other types available in the model.
6.7.6.5 Reverse direction
By right clicking a relation and choosing »Reverse direction« you can reverse the direction of the relation, making it start in the current »end« symbol and end in the current »start« symbol.
6.7.6.6 Show or hide arrows
If you do not wish to show the arrow(s) at the ends of a relation you can right click it and deselect »Show arrow«.
6.7.6.7 Rotate label along relation
By toggling the »Rotate label along relation« option you can control how the text is laid out along the relation. If this option is active the text will be drawn vertically when close to vertical segments, otherwise it will always be drawn horizontally.
6.7.7 Align symbols
When you have selected multiple symbols you can right click the selection and choose »Align...« or use the shortcut »A«. The popup shown contains options that align the symbols in the selection in some way in reference to a »start« symbol. You can see which of the selected symbols is the start symbol on the color of the selection. Many of these alignment options also have keyboard shortcuts that are shown next to the options.
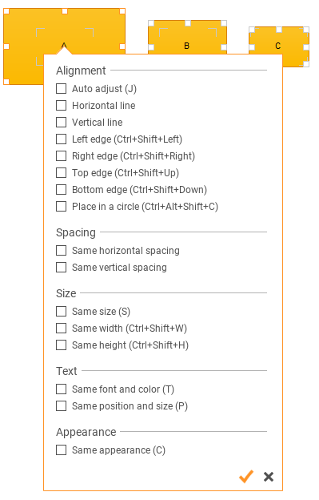
| Auto adjust | The application will try to adjust the position of the symbols according to their current position. If you place symbols in a somewhat straight horizontal line they will be adjusted to a straight line, and the same way for vertical lines. |
| Horizontal line | Places symbols with their center points on a horizontal line. |
| Vertical line | Places symbols with their center points on a vertical line. |
| Left edge | Places the left edges of the symbols along a vertical line. |
| Right edge | Places the right edges of the symbols along a vertical line. |
| Top edge | Places the top edges of the symbols along a horizontal line. |
| Bottom edge | Places the bottom edges of the symbols along a horizontal line. |
| Same horizontal spacing | Moves symbols that lie on a horizontal line so that the distance between each symbol is the same. |
| Same vertical spacing | Moves symbols that lie on a vertical line so that the distance between each symbol is the same. |
| Same size | Makes all symbols the same size. |
| Same width | Makes all symbols the same width |
| Same height | Makes all symbols the same height. |
| Same font and color | Makes all symbol labels the same font and text color. |
| Same position and size | Changes the position and size of the labels so that they all have the same position and size relative to their symbols. |
| Same appearance | Sets the same color and border settings on all symbols. |
6.7.8 Copy, cut and paste
The choices for copying, cutting and pasting are available both in the context menu and in the toolbar. You can also use the shortcuts »Ctrl+C«, »Ctrl+X« and »Ctrl+V«. When you paste copied or cut material into a model you create new symbols and relations pointing to the same objects. If you wish to create completely new copies (new objects) instead you can choose »Paste as copy« instead (»Ctrl+Shift+V«).
The plain copy is mostly used to copy symbols and relations between models in the same repository. If you want to copy a selection to an image to paste into another application you can choose »Copy as image« instead. You get three different choices for the format of the image added to the clipboard:
| Copy image with improved quality | The image looks better on screen and in print but has a white background. Use this when pasting onto a white background where you cannot see the edges. |
| Copy image with transparent background | The image will have a transparent background but the image quality might be somewhat worse. Use this when pasting on top of other material or when the background is not white. |
| Copy image in vector format | The image is saved in a vector format. Not all applications can read this format and you might have to find a special command for importing it correctly. The advantage of the vector format is that the image can be resized without losing image quality, much like the models in 2c8 Modeling Tool which are also drawn in a vector format. |
6.7.9 Breakdowns
To navigate between models in 2c8 Modeling Tools you can create breakdowns to other models from objects or relations. To create a new breakdown you right click the symbol or relation and choose »Create new« under the menu for breakdowns. You can choose to create a completely new model that will get the same name as the symbol you are breaking down from, or to create the breakdown to an already existing model.
If there are current breakdowns from the symbol or relation these will also be shown in the menu. You can choose to open the model in question or to remove the breakdown. If a symbol only has one breakdown you can also follow it and open the model by selecting the symbol and pressing »Enter«.
6.7.10 Text objects and web components
There are two types of objects that behaves somewhat differently from the other types. One of them is the text object which is used to show text in the model. When you create a text object you give it a title but it is not the title that is shown in the model but instead the object's description (see Descriptions and fields). The description can contain formatted text, images and links to other objects and models. For text objects there is also two new options in the context menu for setting the background color and border color of the text object.
The other special object is the web component. When you place a web component in a model it will only be shown as a border and an icon. Through the object properties you can then specify what to show in the web component when publishing as web pages. It could be another web page or an embedded movie clip from YouTube. For more information about these settings see Web component.
6.7.11 Zoom
To zoom in or out in a model you press »Ctrl+Plus« or »Ctrl+Minus« on the keyboard or press »Ctrl« and use the mouse wheel. The model will zoom around the current location of the mouse pointer in the model. To reset the zoom level to 100% use the keyboard shortcut »Ctrl+0«. You can also use the zoom control in the toolbar to control the current zoom level.
6.7.12 Snap
Under View settings there is an option for activating the snap function. This automatically shows support lines for aligning symbols to other symbols in the model.
6.7.13 Grid
Under View settings there is an option for activating the grid. When the grid is active you can see it as little gray dots in the background of the model, and symbols being moved will have their positions locked to the grid. This makes it easy to place symbols in straight lines without having to use the align functions.
If you right click a selection you can choose the option »Align to grid (Ctrl+Shift+G)«. All the symbols in the selection will have their positions locked to the grid at a position that is as close as possible to the current position.
Note that you can use either snap or grid but not both at the same time. It is generally recommended to use snap for easier modeling, but the grid can be useful when you need to place objects at exact positions in the model.
6.7.14 Margins
Under View settings there is an option for toggling margins in the model. You can choose to activate the margins and which format they should have. They will then be shown in the model as an indication of how large you can make the model before printing it or publishing it as web pages.
6.7.15 Undo/redo
Most of the operations you make in the modeling editor can be undone and redone by using the »Undo« and »Redo« buttons in the toolbar or by using the shortcuts »Ctrl+Z« and »Ctrl+Y«. The exception is operations that affects other models as well, such as »Make owner« and »Change object type«.
6.7.16 Refresh model
The toolbar contains a button that refreshes the model from the data source. This is mostly useful in server environments where other users might have done changes since the model was last loaded. You can also use the keyboard shortcut »F5« to refresh the model.
6.7.17 View settings
The toolbar contains a button showing settings for the modeling view. This lets you edit the following settings:
| Snap | Activates the snap function. |
| Grid | Shows the grid. |
| Margins | Shows margins and lets you choose their size. |
| Shadows on symbols | Draws shadows on the symbols in the model. |
| Border around owning symbols | Shows a border on symbols that are "owner" of their objects. |
You can also choose which decorations to show in the model:
| Object tooltips in the toolbar | Shows descriptions for the object types in the toolbar. |
| Shortcuts | Shows shortcuts for description and documents when hovering above a symbol. |
| Translation status | Shows an icon for untranslated labels. |
| Prefix | Shows a badge with the prefix for symbols that have a prefix. |
6.8 Properties sidebar
The navigation bar has a panel called »Properties«. When a model is open it shows information about the currently selected object. If no object is selected information about the model will be shown instead. The following properties can be shown for an object:
| Title | The object's title and editing status. |
| Descriptions and fields | Descriptions and fields set on the object. |
| Documents | Documents connected to the object. |
| Responsible for | Any documents which the object has been designated as responsible for. |
| Relationships | Relations to other objects in the workspace. |
| Participates in | Which models the object is used in. |
| Version | Version history and log. |
| Owner and group | Shows the owner's owner and group and when it was created and last edited. |
| Permissions | Shows the permission flags that controls which users can read and write the object. |
| Custom relationships | Shows the result of any custom relations created for the object. |
6.9 Swimlane models
There is one standard model type that behaves differently from other models in 2c8 Modeling Tool and this is the swimlane model. In a swimlane model some object types are shown as »swimlanes«. When you create a new swimlane model you get to choose the object types that will be swimlanes and which types to automatically create relations to when symbols are placed within the swimlanes.
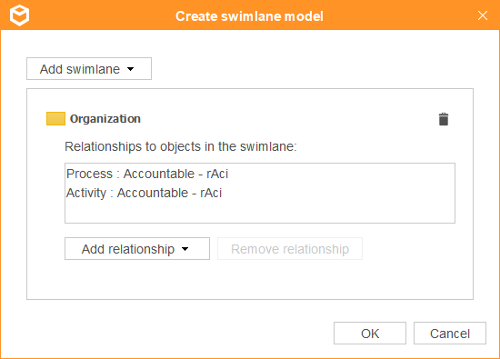
In the example above all positions will be drawn as swimlanes and if you place an activity or a process within the swimlane a relation of type »Accountable - RACI« will automatically be created from the swimlane to the activity/process. The relation will not be visible in the model but is equal to other relations in all other ways. It will be visible in the object properties and can be used to create lists etc.
6.10 Model browser filters
This section describes all available filters when searching for models. There will also be filters available for field types connected to models.
Model type: Models of selected types.
Workflow state: Models in selected workflow states.
Relations: Filters out models based on relations within the models. This corresponds with the way lists were created in previous versions of 2c8 Modeling Tool (see Relation filters and custom relations).
Maintainer/Reviewer/Approver: Selects model based on workflow responsibility. Select one or more users to filter out models where one of the users have the given workflow role. Use the options »No maintainer«, »No reviewer« and »No approver« to include models where the role has not been assigned.
Current selection: Selects the models that are currently selected in the result view.
Breakdowns from current selection: Selects the tree of models that can be reached by starting at one of the currently selected models in the result set and following breakdowns.
Changed since: Models with changes made after a given date.
Not translated: Models that are marked as not translated in at least one language.
Creator: Models with one of the selected users set as creator.
Owner: Models with one of the selected users set as owner.
Last modified by: Models that were last modified by one of the selected users.
Group: Models belonging to one of the selected groups.
6.11 Model browser actions
This section describes all actions that can be performed on the results when browsing for models.
Rename: Renames the selected model. This can also be achieved by pressing F2 or clicking the selected model once more.
Model properties: Opens the properties editor for the model.
Create new model: Creates a new model.
Set field values: Sets values for fields on selected models.
Search/replace: Searches for and replaces text in the titles of selected models. If no selection has been made the search/replace will be performed on the entire result set.
Remove selected: Removes the selected models from the workspace.
Export: Exports the selected models to a file.
Version history: Opens the version history of the model in a new tab.
Show subset: Opens a new browser view that shows the tree of models that can be reached by following breakdowns from the currently selected models.
Show objects: Opens a new browser view that shows all objects that are used in any of the currently selected models.
Set maintainers/reviewers/approvers: Sets users responsible for workflow management for the selected models.
Set owner/group/permissions: Sets the owner, group and permissions to the same values on selected models. These are all used to control read/write permissions in the repository.
Restore removed models: Shows a list of models that were previously removed from the workspace, and lets you restore them if necessary.
6.12 Object browser filters
This section describes all available filters when searching for objects. There will also be filters available for field types connected to objects
Object type: Objects of selected types.
Unused objects: Objects that are not used in any models.
Relations: Filters out objects based on relations within models. This corresponds with the way lists were created in previous versions of 2c8 Modeling Tool (see Relation filters and custom relations).
Field types: Selects objects with existing values for selected field types.
Field data types: Selects objects with existing values of selected data types, e.g. »Number«.
Current selection: Selects the objects that are currently selected in the result view.
In chosen models: Selects objects that are used in one of the selected models.
Changed since: Objects with changes made after a given date.
Not translated: Objects that are marked as not translated in at least one language.
No home model: Objects that has no home model set.
Creator: Objects with one of the selected users set as creator.
Owner: Objects with one of the selected users set as owner.
Last modified by: Objects that were last modified by one of the selected users.
Group: Objects belonging to one of the selected groups.
6.13 Object browser actions
This section describes all actions that can be performed on the results when browsing for objects.
Rename: Renames the selected object. This can also be achieved by pressing F2 or clicking the selected object once more.
Object properties: Opens the properties editor for the object.
Merge duplicate objects: Select two or more objects that are considered duplicates. In the list that is shown, select which one to keep. In all models where the other objects are used they will be replaced with the selected one, so that they can then be removed.
New object: Enter a title and select an object type to create a new object in the repository.
Set field values: Sets values for a field on selected objects.
Search/replace: Searches for and replaces text in the titles of selected objects. If no selection has been made the search/replace will be performed on the entire result set.
Remove selected: Removes the selected objects from the workspace. Note that objects cannot be removed if they are currently used in models.
Export: Exports the selected objects to a file.
Set owner/group/permissions: Sets the owner, group and permissions to the same values on selected objects. These are all used to control read/write permissions in the repository.
Most of the properties on models and objects that are not related to the appearance in the model can be managed in the properties dialog. There is a number of ways to open this dialog from various parts of the application, these are some of them:
- Right click in the model or on a symbol and choose »Properties...«
- Select a symbol and press »Ctrl+D«. If no symbol is selected the model properties will be opened.
- Right click a model in the navigator and choose »Properties«.
In many places in the application there are references to models and objects that can be double clicked. Generally it is the case that following a reference to a model will open it for editing while following a reference to an object will open the properties dialog.
The remainder of the chapter will only refer to the properties for objects to increase readability. The same properties are available for models as well if nothing else is explicitly mentioned.
7.1 Title
At the top you can change the object's title. This has the same effect as changing it from the model but here you cannot set the font and text color. The button to the right of the title field controls the translation status of the object. This is used when working with multiple languages in a repository to keep track of which objects have been translated. For more information about languages in 2c8 Modeling Tool see Languages.
7.2 Descriptions
An object can have one or more fields with the type formatted text. These are edited in the text editors under this tab. For more information about descriptions see Descriptions and fields.
7.3 Documents
This is where you connect documents to objects which can later be accessed from the published models. For more information about document management in 2c8 Modeling Tool see Documents.
7.4 Fields
Fields are tightly connected to descriptions. They work in the same way, the only difference is the type of value they have. Where descriptions can be long formatted text fields are shorter values such as »Cost« or »Risk level«, that can be input using a simple component such as a text field or a drop-down.
7.5 Version and identity
All objects in 2c8 Modeling Tool have a unique id that identifies the object. This is used for example to identify the object as the »same« object when exporting and importing objects between repositories even though the object can exist in different versions with different data. This id is generated automatically and looks something like »5b549de0-a9d0-11e2-9e96-0800200c9a66«. Sometimes it can be useful to have a more readable id and for this you can use the »ID for web« field. When you set an alternative id the object still retains its unique id but the alternative id is used for some functions such as generating file names when publishing models to web pages.
Objects can also have an optional prefix that is shown before the title of the object. The prefix is unique within the repository and can optionally be shown with a small badge on the symbols in a model. Note that the prefix is unique among models and among objects, but a model and an object can still have the same prefix.
If version management is enabled for the repository you can see settings for this at the top For more information about version management in 2c8 Modeling Tool see Workspaces and archives.
7.6 Permissions
When working against a server repository it can often be useful to be able to control access to the objects. This tab lets you set the permission settings that controls which users that can read and write the object. For more information about permissions see Permission groups in a repository.
7.7 Participates in
This tab is only available for objects and shows which models the object is used in. Double click a model to open it. The model will be opened in a tab so you will have to close the properties dialog before being able to edit it.
7.8 RACI
This tab is only available for objects and is only shown for objects that has one or more relations of RACI type to other objects. The four relation types making up RACI is: »Responsible«, »Accountable«, »Consulted« and »Informed«. Double click one of the objects to open it in its own properties dialog. You will have to close the new dialog before being able to edit the original object again.
7.9 Web component
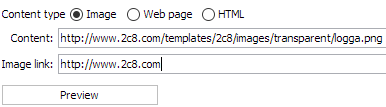
This tab will only be shown for web components and contains settings for what the web component should show when published to web pages. When you click the »Preview« button you can see the result in a panel. The built-in web browser is not a fullscale browser with support for CSS and Javascript so the result will be significantly different from the end result. However, you can still use the preview to test that the content is correct.
The »Image« option shows an image that can be fetched somewhere from the web. You paste the link to the image into the »Content« field. The »Image link« field can be used to provide a link that should be followed when the image is clicked in the published result.
The »Web page« option shows another web page directly in the model. If the web page being linked to is larger than the web component scroll bars will be shown to navigate within the external web page.
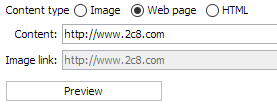
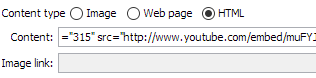
The »HTML« option lets you paste HTML code to show directly in the area where the web component is shown. A common use case for this is to show a movie clip in the model. If you open a clip on YouTube and check its sharing options it will let you copy a piece of HTML for embedding the content in other web pages. This HTML should be pasted into the content field in order to show the movie clip in the published models.
7.10 Swimlanes
This tab is only shown for swimlane models and contains settings for controlling the object types which will become swimlanes and which object types to create relations to (see Swimlane models).
2c8 Modeling Tool is not intended to replace a document management system. Instead you have the option of creating named links to documents in other systems or on shared network disks. It is also possible for third parties to write extensions to the application to be able to link directly to external document management systems.
If you still wish to use 2c8 Modeling Tool for simple document management you also have the option of creating documents directly in the application. The documents are created with the same editor as descriptions (see Edit fields), which means you can create formatted text, images and simple tables etc. It does not replace a complete word processor but in some cases in can be enough and in these cases it can be easier to keep the documents stored in the same system as the models.
8.1 Document editor
When you create or edit a document an editor for the document is shown in a new window. You make changes to the document in one or more of the tabs and then press »OK« to save these changes.
8.1.1 General
At the top you can edit the document title and you can choose a different icon for the document if you do not wish to use the default one.
Under »Link« you enter the path to the document. You can use the »Browse« button to find a document through the file browser. You can also use the buttons below to create an email link, a web link and to test the link by opening it.
You can set a »prefix« for the document and check the checkbox »Lock prefix for editing« to lock the input field where you have entered the prefix. You will also find the specific ID for the document here.
The function »Show link in panel« can be used to show the content of a document directly in the published material, without opening a new window or application. This is most useful when the document links to another website with content that can be shown directly in the browser. You will also have to edit the web profile and choose a panel that should be used for showing document content.
The function »Copy file when publishing to web« can be used when publishing models containing links to local documents on your computer. When you publish the models on another computer you will no longer have access to these documents. If this option has been enabled the document will be copied into the publish directory when publishing. This can be a good solution for a small number of documents but generally it is a better idea to save documents in a shared location which everyone can access.
8.1.2 Types
A document in 2c8 Modeling Tool can have one or more document types. In this view you set which types this document should have. You can also create new document types or remove existing ones.
8.1.3 Permissions
This tab shows information about the owner and group of the document together with the permission settings that control the users which can read and write the document in a server environment. For more information about permissions see Permission groups in a repository.
8.1.4 Usages
Here you can see the models and objects the document has been connected to. Double click a model to open it in a tab, or an object to open its properties.
8.2 Document roots
Document roots can be used to create a common »root« for a collection of documents, for example a folder on a shared network location or a location on a web page. When you create a new document root you give it a name and a value.
When document roots are available these will show up as an option when editing documents. Choose a document root for the document and then just enter the path relative to this root, or choose »Browse« to browse relative to this path if the root is a file path.

The main advantage of using document roots is that it makes it easier to move documents to a new location. Instead of manually updating the path of each individual document you can just update the value of the document root. As long as the document names remains the same all the links to the new location should still work.
8.3 Connect documents to models and objects
The easiest way to connect documents to models and objects is to drag them from the browser (or a browser sidebar) and drop them on a model or objects in a model. You can also connect them through the »Documents« tab of the properties dialog. This view also lets you remove existing connections and reorder the connected documents.
8.4 Document browser filters
This section describes all available filters when searching for documents.
Document type: Documents with selected types. Select the option »No document type« to include documents with no type set.
Unused documents: Documents that are not connected to any models or objects.
Relations: Filters out documents based on relations with models. This corresponds with the way lists were created in previous versions of 2c8 Modeling Tool (see Relation filters and custom relations).
Document root: Documents with selected document roots.
Current selection: Selects the documents that are currently selected in the result view.
Changed since: Documents with changes made after a given date.
Not translated: Documents that are marked as not translated in at least one language.
Creator: Documents with one of the selected users set as creator.
Owner: Documents with one of the selected users set as owner.
Last modified by: Documents that were last modified by one of the selected users.
Group: Documents belonging to one of the selected groups.
8.5 Document browser actions
This section describes all actions that can be performed on the results when browsing for documents.
Rename: Renames the selected document. This can also be achieved by pressing F2 or clicking the selected document once more.
Document properties: Opens the properties editor for the document.
Open path Opens the link in the appropriate application, e.g. a web browser for a web link.
Create new document: Opens the document editor for creating a new document.
Set document types: Sets selected document types on the currently selected documents.
Find duplicates: Finds duplicate documents that have the same path.
Search/replace: Searches for and replaces text in the titles of selected documents. If no selection has been made the search/replace will be performed on the entire result set.
Remove selected: Removes the selected documents from the repository.
Export: Exports the selected documents to a file.
Set icon: Sets the icon on selected documents.
Set document root: Sets a document root on selected documents.
Copy file when publishing to web: Enables or disables the option for copying documents when publishing, for the selected documents.
Show link in panel: Enables or disables the option for showing the content of a document in a panel when publishing, for the selected documents.
Check links: Scans the selected documents for invalid links. If no selection has been made, the entire result set will be scanned.
Match to document roots: Scans the selected documents, trying to find documents that could be using a document root. Documents with content that matches an exising document root are shown in a list, where you can replace the existing content with the appropriate document root.
Set owner/group/permissions: Sets the owner, group and permissions to the same values on selected objects. These are all used to control read/write permissions in the repository.
8.6 Document type browser filters
This section describes all available filters when searching for document types in the browser view.
Unused document types: Document types that have not been set on any documents.
Current selection: Selects the document types that are currently selected in the result view.
Changed since: Document types with changes made after a given date.
Not translated: Document types that are marked as not translated in at least one language.
8.7 Document type browser actions
This section describes all actions that can be performed on the results when browsing for document types.
Rename: Renames the selected document type. This can also be achieved by pressing F2 or clicking the selected document type once more.
Documents with selected types: Opens a new browser view that lists all documents that have any of the currently selected document types.
Create new document type: Creates a new document type.
Search/replace: Searches for and replaces text in the titles of selected document types. If no selection has been made the search/replace will be performed on the entire result set.
Remove selected: Removes the selected document types from the repository.
Export: Exports the selected document types to a file.
8.8 Document root browser filters
This section describes all available filters when searching for document roots in the browser view.
Unused document roots: Document roots that have not been used on any documents.
Changed since: Document roots with changes made after a given date.
8.9 Document root browser actions
This section describes all actions that can be performed on the results when browsing for document roots.
Rename: Renames the selected document roots. This can also be achieved by pressing F2 or clicking the selected document root once more.
Documents with selected roots: Opens a new browser view that lists all documents that are using one of the currently selected document roots.
Create new document root: Creates a new document root.
Search/replace: Searches for and replaces text in the titles of selected document roots. If no selection has been made the search/replace will be performed on the entire result set.
Remove selected: Removes the selected document roots from the repository. Note that removing roots that are used may lead to documents becoming invalid.
Export: Exports the selected document roots to a file.
The chapter Documents showed how to create links to external documents and simple internal document, and how to connect these documents to models and objects. If you want to connect data directly to a model or object you use descriptions and fields instead.
9.1 Types
2c8 Modeling Tool lets you create multiple data types and choose which object types they should apply to. By default there is one type called »Description« that is of type »Formatted text« and is connected to all object types. You can create new types and connect them to available object types through the browser.
| Text | A single line of unformatted text. |
| Objects | Refers to an object of a given type in the repository. |
| Number | A number within a specified range and with an optional unit. |
| Formatted text | Formatted text saved as HTML which can contain tables, images etc. |
| Dropdown | A value chosen from a predefined list of values. |
| Checklist | One or more values chosen from a predefined list of values. |
| Relations | Shows for each object the result of a custom relation with that object as input. |
9.2 Edit fields
All fields of type »Formatted text« for models and objects are edited in the tab »Description« of the properties dialog. There will be one text editor available for each type that is connected to the current object type. Most functions are recognizable from other simple text editors and so we will not cover all of them here.
| Translation status | Used to manually keep track of translation status when working with multiple languages in a repository. |
| Insert image | Inserts an image that is stored in the repository. These are the same images used to replace a symbol's appearance with an image in a model. |
| Link properties | To create a link to a model, object or document from a description you select the text and choose Link properties. The window shown lets you choose from all available models, objects and documents in the repository. |
| Clear formatting | Clears the formatting of selected text. |
All other fields are edited in the tab »Fields« where editors for all connected data types are shown in a single column.
When you have a model open in the editor you can also edit field values directly from this view by selecting »Show table« from the tool bar. In the table that is shown select an object type from the drop down to show all objects of this type in the table. The values for field types connected to these objects can now be edited directly in the table.
9.3 Description/field browser filters
This section describes all available filters when searching for descriptions and fields in the browser view.
Unused field types: Field types that have no values set for any models or objects.
Current selection: Selects the descriptions/fields that are currently selected in the result view.
Changed since: Descriptions/fields with changes made after a given date.
9.4 Description/field browser actions
This section describes all actions that can be performed on the results when browsing for descriptions and fields.
Rename: Renames the selected field types. This can also be achieved by pressing F2 or clicking the selected field type once more.
Connect to types: Chooses which types (models and object types) that the currently selected field types should be used for.
Set order: Sets the order in which to show the field types in cases where more than one type is connected to models/object types.
Create new field type: Creates a new field type.
Search/replace: Searches for and replaces text in the titles of selected field types. If no selection has been made the search/replace will be performed on the entire result set.
Remove selected: Removes the selected field types from the repository. Note that removing field types that are in use may cause data to be lost.
Export: Exports the selected field types to a file.
9.5 Status and categories
In earlier versions of 2c8 Modeling Tool you could set status and categories on models and objects. These have now been converted to the field types Status with the type Dropdown and Category with the type Checklist.
When you describe a business in detail there can be a lot of information, and often only some of it is necessary in order to »get the picture«. In these cases you can choose to use layers to control how the information is presented to the user. Layers are shown in the »Layers« panel of the navigation bar. When you have a model opened you can see the layers available for that model type and you can create new layers and edit or remove existing ones. Any new layer types created will be available for all models of the same type.
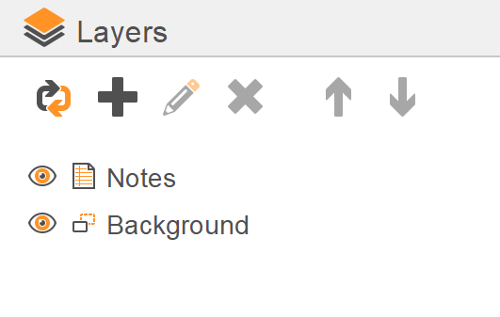
The order of the layers in the list controls which layer will be drawn »on top«. You can change the order by using the »Move up« and »Move down«. The exception is the background layer that always exists and will always be drawn behind other layers.
When you create a layer you get to give it a name and choose an icon from a predefined list of icons. You can also choose a set of object types to automatically place in this layer when they are placed in the model.
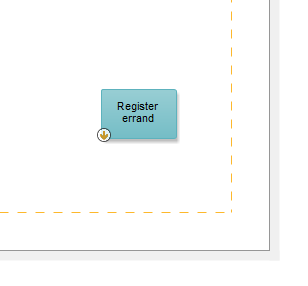
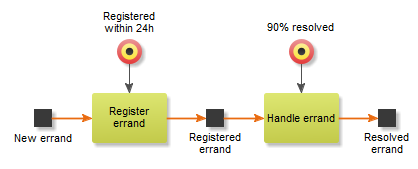
The example below shows a minimal process model for errand handling with targets connected to the activities. There is also a »Targets« layer but the target symbols are not yet in it. To move the symbols to the correct layer you select them, right click and choose »Move to layer/Targets«.
Next to the layer in the navigator panel is a button for toggling the layer between three states: »visible«, »hidden« and »semi transparent«.
When you create symbols and relations between them in different models you quickly end up with a large set of interconnected objects. These connections are often divided into different models and it can be hard to visualize these dependencies without having to jump between them. The examples below show some dependencies that might be interesting to display.
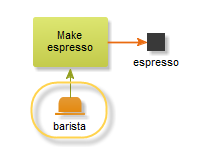
To solve these and similar problems 2c8 Modeling Tools provides the option of creating relation filters (see Filters) in the browser, and custom relations. The functions are very powerful and by experimenting with them you will discover new ways to use them that might not be covered in these sections.
11.1 When to use what?
Relation filters and custom relations behave very similar with the main difference that the result of a relation filter is static while the result of a custom relation is based on a currently »selected« object. You use filters when you want to list data from the workspace as a whole and custom relations when you want to list dependencies for an object based on its relations to other objects.
One example is a custom relation that lists all roles that performs a process. The result of the custom relation is all roles that performs the currently selected process. The corresponding filter on the other hand, would list all roles that performs some process in the workspace, any one.
11.2 Relations between objects
When working with relation filters it is important to remember that the result is based on relations between objects. This means that you cannot necessarily follow the chain of relations within a single model, the result can be based on a combination of relations in different models. The below example illustrates this with a filter that lists »All business objects that are results of an activity that in turn is consulted by a role«.
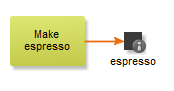
The result of running the filter is the object »espresso« even though the relations are in different models.
11.3 Creation of filters and custom relations
To create, edit and remove relation filters you use the Browser's filter function. To create, edit and remove custom relations you open the panel in the navigation bar called »Relations«.
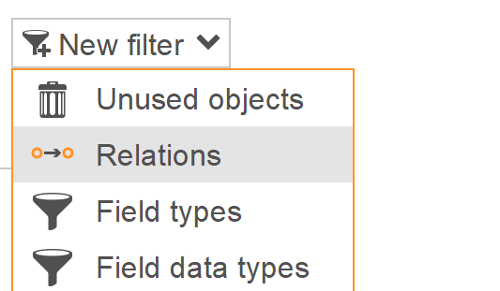
11.4 Editing filters
When you create a new filter or choose to edit an existing one it will be opened in a popup together with the rest of the list. The filter will be saved when the list is saved.
This chapter will cover all functions in the relation editor with a focus on relation filters (as opposed to custom relations). It concludes with the differences in the user interface when working with custom relations (Custom relations).
11.4.1 Object filters
We start with showing how to edit object filters. Model filters and document filters differ somewhat in function and are therefore treated separately. At the top of the relation editor you choose which type of object you wish the filter to return. Click the type to select a different one. The filter in the figure below will return all processes in the workspace. The button »Add group« at the top is used to create new groups that will be included in the result (see Groups).
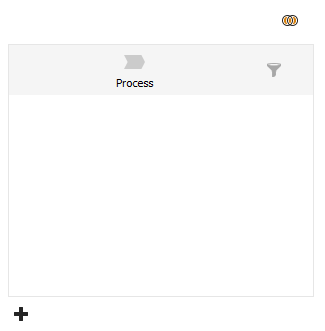
By clicking the »Add relation« button at the bottom you add a new relation from the resulting object. This inserts a new row below the resulting object with a relation type and a new object type. The correct interpretation of this is that the resulting object must have a relation with the given type to another object with the second object type. To the right of the new object type there are buttons for removing the relation or reversing its direction, i.e. the relation must go from the other object to the resulting object instead. There is also a button for adding a subfilter for which objects of the given type that are accepted (see Subfilter), and a button for creating branched flows (see Branched flow chains).
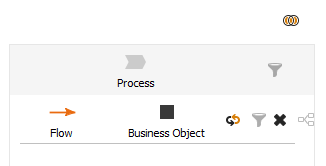
You can keep adding relations to the filter. The filter should be read as a »chain« of relations, i.e. new rows are relations from the object in the previous rows and not from the resulting object. One tip is to read in the direction of the relation arrow. The filter in the figure below is read as »role is responsible for activity«, but »application is used by activity« since this relation goes in the other direction.
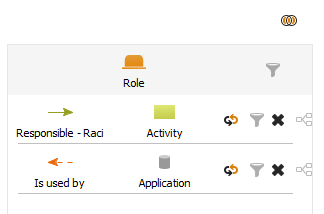
11.4.2 Model filters
Model filters work pretty much in the same way as object lists. First you choose which type of model to filter on. You can see the main difference when adding the first row below this which will now specify that the model contains an object of a given type. From this row on you can then specify further relations in the same way as for object filters.
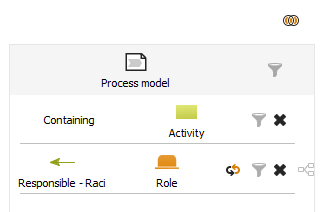
11.4.3 Document filters
In document filters you no longer have the option of creating flow chains like in the other filter types. Except for creating subfilters for the documents selected (see Subfilter) the only thing you can add is a row specifying that the document should be used in a specific model. Click »Add a constraint« on this row to specify which model. When we say used here we mean that the document must be connected to either the model or one of the objects in the model.
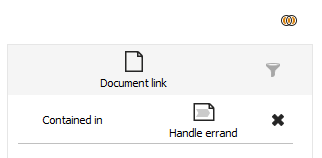
11.4.4 Subfilter
If you click the subfilter icon (funnel) by an object type in the list you can set additional conditions that must be met for this object to be accepted. The window showing lets you add one or more criteria. In the left column you choose the type of criteria and in the right its value.
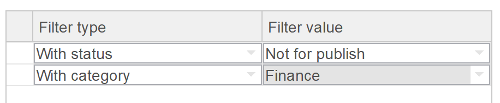
| With status | The object must have a given status. This subfilter is also available for models in model lists. |
| With category | The object must have a given category. This subfilter is also available for models in model lists. |
| Specific object | Used to choose a specific object. There is no point in combining this criteria with others since it has already been filtered down to one specific object and cannot be filtered further. |
| In model of type | The object must exist in a model of a given type. |
| With document of type | The object must have a document with a given type connected to it. |
| Of type | This criteria is only available for document filters and only shows documents with a given type. |
If you have more than one criteria you can choose how to combine them. By default all criteria have to be met, but you can choose to let one of them suffice.
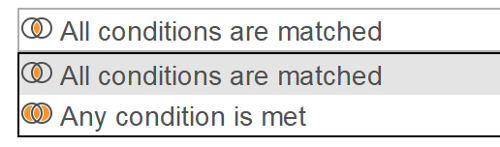
Using the »or« combination instead of the default »and« combination can sometimes lead to slow execution of the relation filter. These types of filters can often be replaced with ones that use multiple groups instead (see Groups).
11.4.5 Branched flow chains
By adding new relations to a list you create a chain of relations describing the result of the list, but you cannot add multiple flows from a single object in the list this way. To add a side flow, or »branch«, from an object you click the icon at the far right of the row. This shows a new view based on the object from the previous list where you can create the side flow. There are links at the top for navigating back up in the structure.
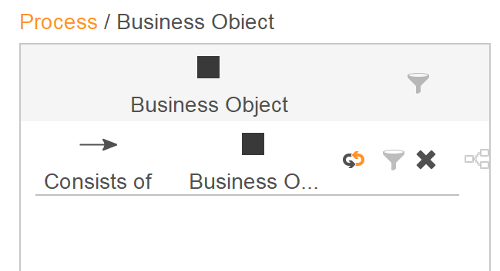
To understand the flow in the figure presume that you have made an ordinary filter with a business object somewhere in the flow chain. What the branched flow does is basically to add another filter criteria on this business object that says that in addition to any other filter critera there must also be a relation from it of the type »Consists of« to another business object.
11.4.6 Groups
By creating new groups in the filter you can build the filter's result as a combination of multiple »filters«. When it is executed the result of each filter is fetched and combined into the final result. There is only one group available by default and this is the one we have been using so far. You create new groups by clicking the »Add group« button at the upper right corner of one of the current groups.
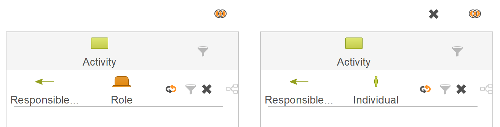
Groups can also be used to improve performance for some types of filters. A common use case is to list all documents with at least one of a given set of document types. The easiest way to solve this is to create a subfilter and add all document types as criteria. Then combine these with the »or« type combination so that having one of the types is enough. For technical reasons the execution of this type of list can be slow. To get around this you can choose to create a separate group for each document type and for each group create a subfilter containing only that type. The result will be the same at the end since all duplicates are removed in the end result and the sorting is done on the final result.
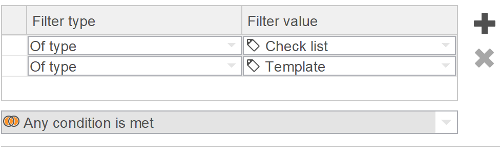
11.4.7 Custom relations
A custom relation is edited in much the same way as a relation filter with the only difference being the concept of a »clicked symbol«. Above the group editors you get to choose the type that the relation is defined for. Within the flow chains in the group editors you then have the option of selecting the option »Clicked symbol« instead of simply choosing an object type.

The figure shows a common use case for custom relations. In a process model the activities are modeled together with roles that are responsible for performing them. In addition to this there is one or more organisation models showing the individuals that can actually play these roles in the organisation. The relation in the figure combines the information in these models to be able to provide a list of individuals that can perform the currently selected activity.
Custom relations require a somewhat different way of thinking than filters and can be perceived as »backwards« since you start with the result and not the selected object. The reason for this is that the selected object in many cases can be placed in the middle of the chain of relations being described. You can even specify the selected object multiple times within the same custom relation if needed.
The matrix function in 2c8 Modeling Tool builds upon the list functionality and lets you create matrices of data in your repository. Matrices are shown in their own panel in the sidebar.
12.1 Creating matrices
To create a new matrix you choose »Matrices« in the sidebar and click the button for creating a new matrix.
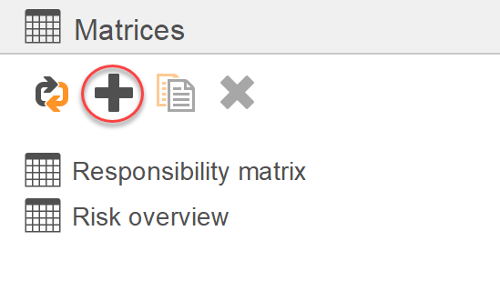
In the matrix editor you choose a list for each axis. These lists are used to generate the values for each axis of the matrix. You then add one or more relations to show in the matrix. You can choose between the following relations:
| Participates in | Shows which models objects are a part of. This relation assumes that y-axis shows objects and the x-axis models. |
| Relations | Shows relations between objects. Assumes objects on both axis. |
| Custom relations | Works the same way as relations but you can use custom relations created in the repository. |
| Connected to | Shows which models and objects documents are connected to. Assumes documents on the y-axis and models and/or objects on the x-axis. |
| Maintainer, approver, reviewer | Shows which workflow roles users have for models. Assumes models on one axis and users on the other. |
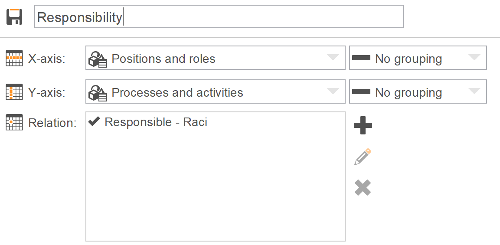
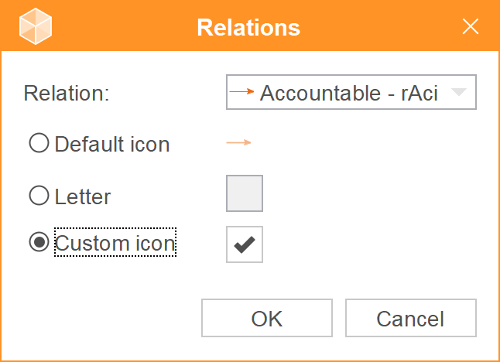
When you save the matrix the result is shown below the settings. Above the result you have the following options:
| Refresh | Updates the result view with current data according to the matrix settings. |
| Hide empty rows and columns | Hides rows/columns without relations. In the example below the "CEO" column will disappear. |
| Copy to clipboard | Copies the result as text to the clipboard so it can be pasted to for example Excel. |
| Export to PDF | Exports the matrix as a PDF document. |
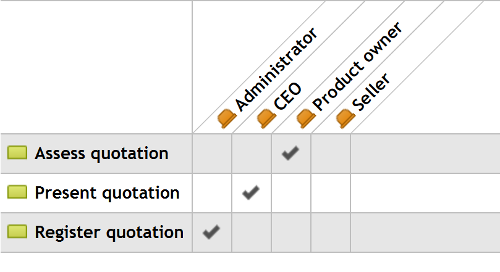
12.2 Grouping matrices
For some types of lists you have the option of grouping the axis. For example if the axis is a list of objects then it can be grouped »By model«, which will show each model as a group with all objects that are used in that model.
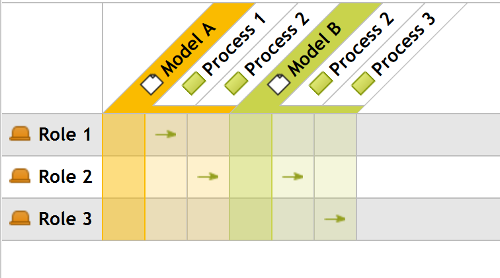
12.3 Publish matrices
You publish matrices in much the same way as lists. Open the web profile and choose »Layout«. Under the tabs »Menu«, »Models« and »Symbols« you now have the option »Matrix« to show the result of a matrix. When you add a matrix in either of these places you get to choose which matrix to show.
When you create a repository in 2c8 Modeling Tool it contains a single language. If you need to translate the content of the models you can create new ones by choosing »Tools/Languages/Edit languages...« and then »Create new language«. The new window shown lets you choose a name and a flag for the new language. You can also choose a hyphenation dictionary to get automatic hyphenation of titles in the models (see Hyphenation in models).
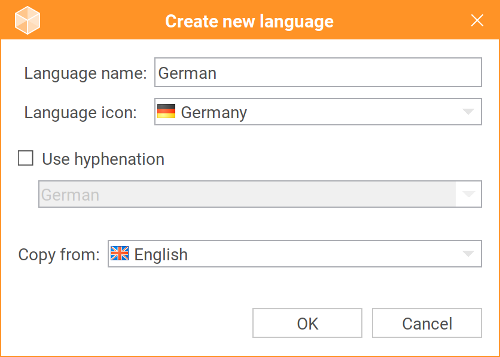
When you have multiple languages in a repository you can switch between them by pressing the flag icon in the status bar or by using the keyboard shortcut »Ctrl+L«.
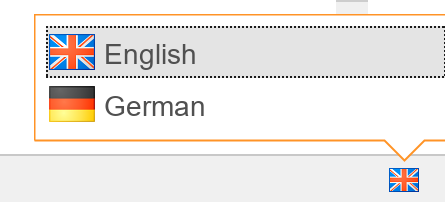
Some languages uses characters that are not included in the font used by default in 2c8 Modeling Tool and these characters will then appear as little squares or something like that. If this happens you can choose »Tools/Settings...« and activate the option »Use international font«. The next time you start the program the user interface will be using a font that can handle most of the character sets that might be relevant, such as chineese, japaneese etc.
13.1 Hyphenation in models
To force a new line in a label in a model you can manually add a soft hyphen in the title of the object and then resize its label. To add a soft hyphen, press »ctrl+dash«. Alternatively you can choose to activate automatic hyphenation that is based on the current language and the size of the label. To work correctly the hyphenation function needs dictionaries to be installed for the correct language and for licensing reasons these can not be included directly in the installation. To install the available dictionaries you choose »Tools/Languages/Import hyphenation dictionaries«. Follow the instructions to download the dictionaries somewhere on your hard drive and then choose »Import dictionaries...« to install them.
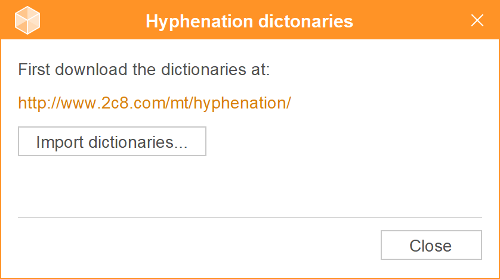
When they have been installed you can activate hyphenation for a language when you edit it under »Tools/Languages/Edit languages...« in the menu.
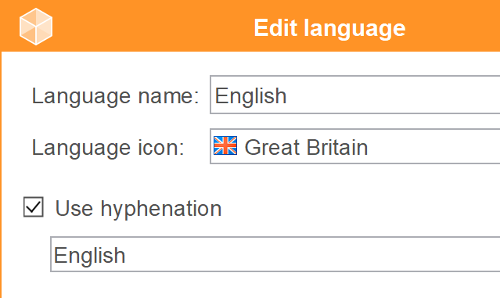
With hyphenation activated long titles will automatically be hyphenated in the models based on the size of the label. In a server environment you must make sure that all users have installed the dictionaries in order to make it work correctly. If they are missing the user will get a warning when opening the model.
13.2 Translations
When adding multiple languages to a repository one of them is always marked as the default language. This is used for translations. All data in a repository has a translation status. In the default language this status will always be »translated« but in other languages it will be »untranslated« until you manually change the text. The status will also be changed from »translated« to »untranslated« in all other languages when you change the text in the standard language.
If you want to be able to see the translation status in the models you can activate this setting from the view settings in the editor toolbar. Any non-translated symbols and relations in the model will be shown with an icon to indicate that they need to be translated in the current language.

There is also an extension available for doing external translations of data in a repository, for example through a translation agency. See Plugin for information about how to install extensions. When the translation extension has been installed you will have new options under »File/Export« and »File/Import« in the menu for exporting and importing translation data. The translation status can be used here to only export data that has not yet been translated.
We showed earlier how you can set the color of a symbol in a model (Appearance). If instead you wish to alter the colors for the entire repository you can create a color profile that defines the colors of symbols and relations based on their type. To manage color profiles you choose »Tools/Color profiles...« from the menu.
In this dialog you choose the active color profile for the current repository by choosing it in the drop-down. If you have created your own color profiles these will show up in the list.
You can also create, edit and remove profiles using the buttons on the right side. There are buttons for exporting profiles to be able to import them to another computer or to a server. The color profiles you create here are »global« in the sense that they can be used in all your repositories. The exception to this rule is when you work against a server, in which cases profiles created for local repositories cannot be used in server repositories and vice versa.
The window shown when editing a profile lets you choose which object type or relation type to set the color for. When you have selected a type you can change the color and border in the same way as for a single symbol (see Appearance) and set the default text color. You also have a preview at the bottom showing the final result.
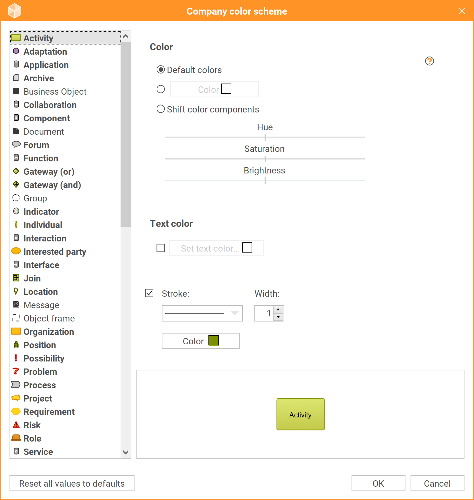
To print models you choose »File/Print...« from the menu or use the keyboard shortcut »Ctrl+P«. In the print preview you can choose which models to print. The »Page setup« tab lets you choose paper size, orientation and margins for the pages.
The print function does not print the models directly to a printer. Instead a PDF file will be created that can be printed with any printer, sent via email etc.
To publish content from a workspace you choose »Tools/Publish...« from the menu. You can choose to publish to web pages, reports or Excel spreadsheets. When publishing to web pages or reports you can create and edit new profiles that controls what to publish and how. The profile for Excel is static and cannot be removed or edited.
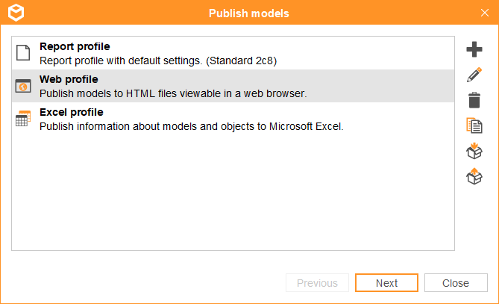
16.1 Publishing to web
The web profile is where you make settings regarding appearance, functions, and information in the published material. You will find the web profile under "Tools" - "Publish".
16.1.1 Create a new web profile
In 2c8 Modeling Tool, there is a standard web profile called "Web profile", however, you can add as many web profiles as you like. These profiles can contain specific settings for different publish locations. Create a new web profile by clicking the plus sign.
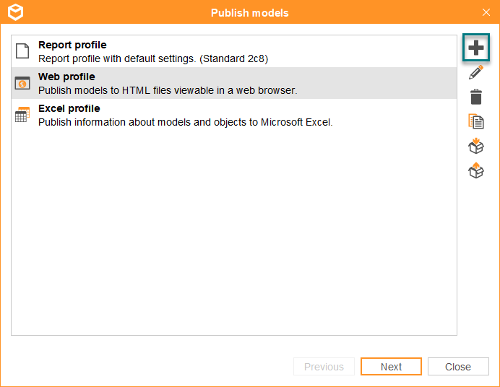
16.1.2 Edit web profile
Click on the web profile you wish to edit, then click on the edit pen to the right. When the web profile is opened, you will see a view of the different areas of the published material which you can edit.
16.1.2.1 General settings
These settings are general for your published material and you can find these on the right side of the web profile.
| Name of profile |
Name the web profile.
| Description |
A description for the web profile.
| Start model |
Choose a start model for your published material. This model will be the starting page of the published material and the model which you navigate from.
| Models to publish |
This is where you choose which models to publish from your repository. There are three different ways to make this selection:
- Manually choose which models to publish.
- Base the selection of a list you created in 2c8 Modeling Tool.
- Use the filter function to select which models to publish directly from the web profile.
Under "Versions" you can check "Approved versions of models", which means only approved models in your selection will be published. If you also check "Include models without approved version", models that have not been approved before will also be included in the published material.
| Design |
- Choose the font in the published material. This will for example affect the text in the menu, the text in the left panel, and headings in the published material.
- Choose the colour of details in the published material. This will affect clicked areas in the published material.
- Choose the colour of the backgrounds in the published material. This will affect panels and clickable details.
| Advanced settings |
Under "Advanced settings" you can find the following settings:
- Generate pdf-files for lists
- Generate xls-files for lists
- Icon for web browser (.ico)
- Webpage title
- Use an external search engine
- Translations
- Custom HTML
16.1.2.2 Edit
The web profile is built upon the different areas of the published material and each is editable. In the edit mode, you edit the settings in the web profile. The web profile consists of the following editable areas:
- Model area
- Panels
- Logo
- Menu
- Functions
16.1.2.3 Preview
In the preview mode, you can see how the settings you have made will affect the result. You can click around in different models, test out functions and see how your settings will work in the published material.

Preview computer/phone
You can switch between a preview for computer and phone to see what the published material will look like on the end-users phone or computer.

16.1.2.4 Model area
Click on the edit pen which appears when you hover over the model area in the web profile. This is where you make settings affecting the area where you can see and click around in your models in the published material.
| Edit model area |
- "Breadcrumbs": Shows the breadcrumbs when navigating from models in the published material.
- "Shadows on objects": This shows a shadow behind objects in the published material.
- "Breakdown icon": Click on the breakdown icon to the right to select an icon.
- "Information icon": Click on the information icon to the right to select an icon.
”Selected object”: Decides the colour of an objects when clicking on it.
”Settings for objects”: As a standard in the web profile, the settings you make will be applied to all objects. You can make custom layouts and, therefore, make special settings for specific objects based on filtration. Click on the edit pen to make these settings. Read more about custom layouts in Custom layout.
- ”Show breakdown icon”: Turn off this option to hide the breakdown icon on broken-down objects.
- ”Show information icon”: Turn off this option to hide the information icon on objects containing information.
- ”Follow link when clicking object”: When you click on an object in the published material, the standard behaviour is that the information connected to the object is shown in the panels of the published material. This option however makes it possible to either follow a breakdown or open a document link when clicking on an object. This option can be useful when, for example, you want to open a document/link when clicking on a certain object type, or if you want to hide the breakdown icon on certain objects and instead navigate by clicking anywhere on the object.
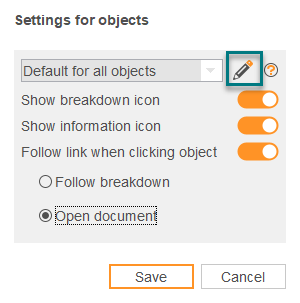
16.1.2.5 Panels
Information about models or objects is shown in the panels of the published material. You can edit what kind of information you want to show in the panels when clicking on models or objects. You can also choose where you want to show information about models or objects by adding or removing panels in the web profile. The panels can be places to the left, to the right, or at the bottom of the published material. As a standard in the web profile, there is a left panel.
| Add panel |
Hover with the cursor to the right or at the bottom of the web profile and click on the plus sign that appears to add a panel.
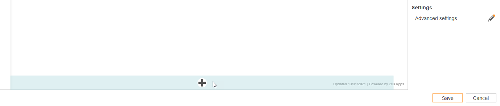
| Edit panel |
The following settings are relevant for all panels in the web profile. Hover with the cursor over the panel you want to edit and then click on the edit pen. This will allow you to edit what kind of information you want to show in the panel when clicking on a model or an object in the published material.
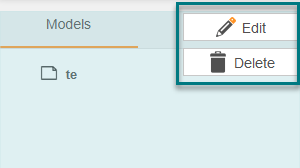
| "Model" |
Under the title "Model" you decide what kind of information you want to show about models in the published material.
Edit name of tab - Edit the name of the tab by double-clicking on the tab.
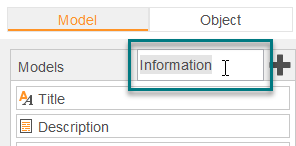
Add tab in panel - You can add more tabs to your panel. In these tabs, you can add information that you want to show when clicking on a model. Click on the plus sign to add another tab.
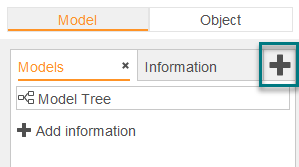
Add information - Add the information you want to show about models in the panel by clicking on the plus sign as shown in the image below:
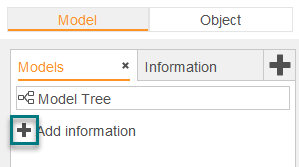
Edit information for models - You can edit the information further by moving the mouse cursor over the information in the panel and then click on the edit pen.
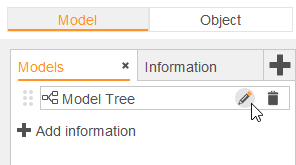
| "Object" |
Under the title "Object" you decide what kind of information you want to show about objects in the published material.
Edit name of tab - Edit the name of the tab by double-clicking on the tab.
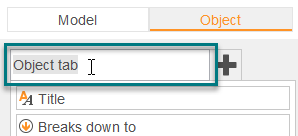
Add tab in panel - You can add more tabs to your panel. In these tabs, you can add information that you want to show when clicking on an object. Click on the plus sign to add another tab.
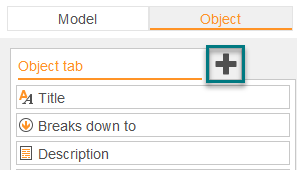
Add information - Add the information you want to show about objects in the panel by clicking the plus sign as shown in the image below:
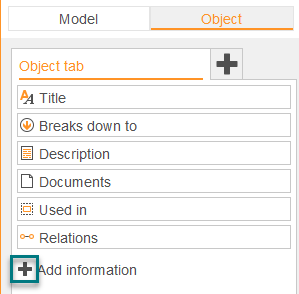
Edit information for objects - You can edit the information further by moving the mouse cursor over the information in the panel and then click on the edit pen.
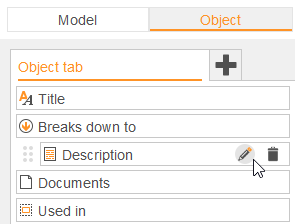
| Other settings in panels |
Settings for objects/models - As a standard in the web profile, the settings you make will be applied to all objects or models. You can make custom layouts and, therefore, make special settings for specific objects or models based on filtration. Click on the edit pen to make these settings. Read more about custom layouts in Custom layout.

”Show content of links in this panel” - Documents that are links and have the check-box "Show link in panel" checked will show the content of the link in the panel if this option is active.
Responsive settings - Common to all types of information you want to show in the panels is the responsive settings. This is where you can choose if you would only like to show the information in the panel when visiting the published material on a phone or via computer, or both. For example, you can choose not to show document links for mobile users, or not show the model tree for computer users.
16.1.2.6 Logo
Hover with the mouse cursor over the standard logo and click on "Edit" to change the logo. The optimized size for a logo in the published material is 400x120 pixels.
16.1.2.7 Menu
In the menu, you can choose to show different types of information. For example, documents, lists, matrices, or links to specific objects or models. In the menu, you usually show more general information that needs to be easily accessed by the end-user.
Add menu item - To add another menu item you click "Add menu item". The menu item can either be a dropdown menu containing multiple different items, or a list or a matrix directly in the menu.

Edit content of menu items - Hover with the cursor over the menu item and click on the edit pen to edit the settings for the menu item.
- ”Filter on active model”: Matrices or lists can be filtered based on the content of the current model being viewed in the published material. For example, if you have a list containing all the roles in your repository and filter this on the active model in the menu, only the roles in the specific model you are viewing at the moment will be visible in the list.
- ”Show as a dropdown menu”: The content of the list will be shown as a dropdown menu from the main menu in the published material.
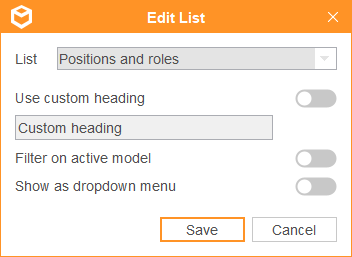
Settings for models - As a standard in the web profile, the settings you make will be applied to all models. You can make custom layouts and, therefore, make special settings for specific models based on filtration. Click on the edit pen to make these settings. Read more about custom layouts in Custom layout.

16.1.2.8 Functions
You can edit, add, or remove functions from the published material.
Edit functions - Click on the edit pen to edit the functions in the published material.
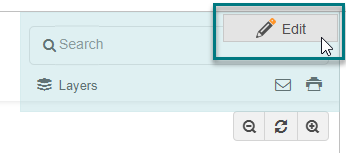
Add function - Click ”Add function” to add more functions.
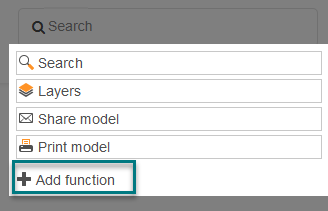
| Layers |
Hover with the cursor over the function area of the web profile to edit the layer function.
Edit layer - You can edit layers by clicking on the edit pen on the function "Layer".
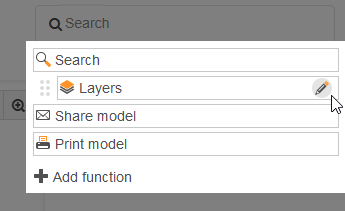
This is where you choose which layers you want to include in the published material, which ones you want to show by default, and which ones you want to allow hiding.
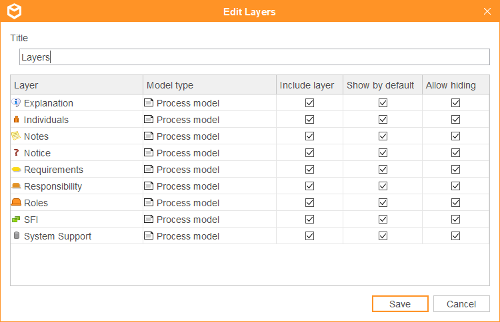
- ”Include layer”: All objects in this layer will be included in the published material.
- ”Show by default”: All objects in this layer will be shown by default.
- ”Allow hiding”: All objects in this layer can be actively hidden by the end user by clicking the layer button in the published material.
| Language |
Edit the language in the published material by clicking the edit pen in the function area of the web profile.
Edit language - If you have worked with multiple languages in your models (translations), you can choose which language you like to include in the published material. You can also choose the default language. The end-user can change language in the function area of the published material.
Translations - You can translate different titles and terms in the web profile manually by choosing an active language in the left corner of the web profile. This drop down menu is only visible when having more than one language in the repository. See below image:
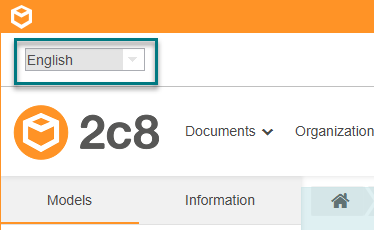
The language you have chosen in the above list is the language you are currently editing. For example, if you would like to translate the titles in the menu of the published material, you choose the language you want to translate to in the dropdown menu and then translate the information in the web profile by editing it.
Translations such as support messages for screen readers or error messages in the published material are found under "Advanced settings". Read more about advanced settings in General settings.
16.1.3 Custom layout
In the web profile, you will encounter the function "Custom layout" in multiple editable areas. This function makes it possible to filter models or objects based on metadata, and then apply settings on this specific result. This means you can make special settings in the web profile for certain models or objects that you have selected.
16.1.3.1 Filtering
You can create multiple different filtrations for which you, later on, can apply custom settings for.
To create a new filter, click on "Add filter".
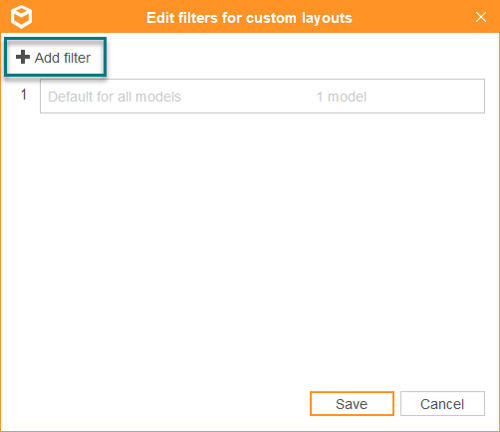
Name the filter and start to filter a result by choosing some sort of metadata, either based on model type/object type, fields, or title. You can also choose to continue your filtration for a more specific result by clicking "New filter" and choose other types of metadata. In this example, we will choose to only filter on process models.
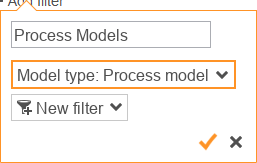
This will give us a filter containing all process models in our published material.
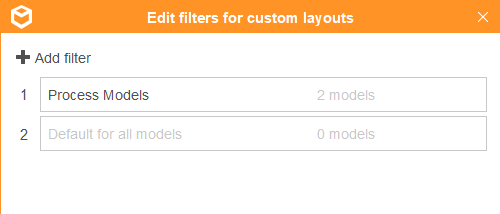
Thereafter, we choose our created filter in the list of custom layouts. All the settings we make in that specific part of the web profile will only affect the models or objects included in the chosen filter. In this example it will only affect process models.
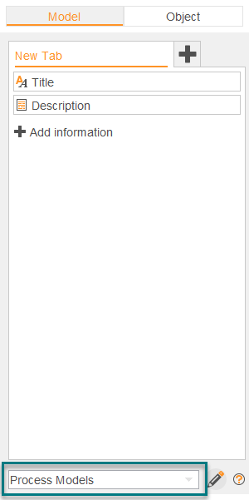
16.1.3.2 Order of priority in custom layouts
Filter for custom layouts has an order of priority. This is because models and objects can be included in several different filters. If we should add a filter for all models with the status "Work in progress", this may include some process models which are already included in our filter for process models. This means we would have two filters where the same models are included. In order to control what information should be visible when viewing a model that is included in multiple filters, an order of priority is used. You can move your filters up and down to change the order. The filter on the top is the one with the highest priority and will be applied on all models or objects that are included in multiple filters. At the bottom, we have the collecting filter which applies to "all other" models or objects which are not included in any other filter. This can not be moved or deleted.
16.2 Publishing to web - old web profile
To publish models as web pages you choose one of the web profiles and press »Next«. Then choose where to publish the models to (see Publish destinations). When you click »Publish« the content will be published according to the profile settings and copied to the chosen destination.
All the settings for the appearance of the published models are made in the web profile. This includes which content to publish, how to structure the web pages, color scheme etc. At the bottom of the profile editor there is a button for previewing the result in a web browser.
Under »Profile« you can set the name and description of the profile itself and which model to use as the first one shown when opening the published web pages.
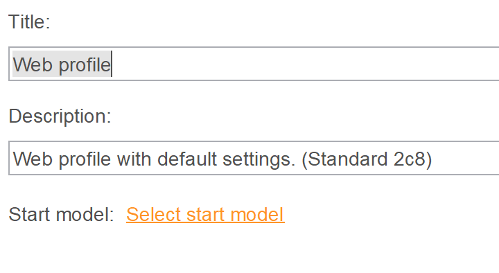
16.2.1 Filter
Under »Filter« you choose which models to publish and which layers and languages to include. The default choice is to publish everything but you can choose to select specific models instead. When you pick models you can also choose to »Include breakdowns to other models« to publish the set of models that are reachable from the selected models.
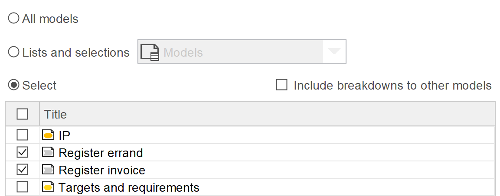
If you are using workflow (see Maintenance) you can choose to only publish approved versions. By using this function you can keep working with models but only publish the latest approved versions of the models instead of the work material. If a model is editable and in its first version it will not be included at all when publishing since there is no approved version of it. If you still wish to include these models you can enable the option »Include models with no approved version«.
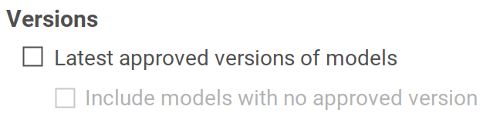
If you have been using layers in your models you can choose how these should be presented in the published models under »Layers«. For each available layer there are three options:
| Include layer | Uncheck this to not show the layer at all. This can be used for example to model problems and risks in a model but exclude these from the published material. |
| Show by default | With this option enabled the layer will be visible when a model is opened, otherwise it will be hidden with the option of showing it. |
| Allow hiding | This option controls whether the layer can be toggled in the published material. It is only meaningful when the layer is shown by default and can be unchecked for layers that should never be hidden in the published material, such as the main flow in a process model. |

If you have multiple languages in a repository you can choose which languages to include under »Languages«. If you choose more than one language their flag icons will be shown at the top of the web page and can be used to switch between the languages.
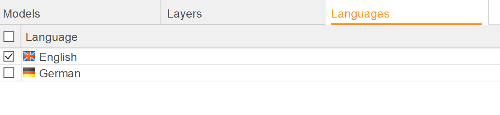
16.2.2 Layout
The tab »Layout« contains settings that controls which information to show and how to show it. The published web pages consist of the following parts:
| Top panel | The panel at the top of the page contains a logo, menu and search field. |
| Center panel | Shows the current model and an optional breadcrumb for navigating to previously opened models. |
| Information panels | The information panels show information based on the current selection in the model. If an object is selected information about this object will be shown, otherwise information about the model is shown. The information panels can be shown to the left of, to the right of, and below the model. |
| Popup | The popup is similar to the other information panels but can only be used to show information about objects and is shown on top of the currently selected object. |
16.2.2.1 Page
The »Page« tab has settings for the page layout, i.e. what panels to use and their sizes. The user interface is meant to give an approximate idea of the final layout. At the top you select which panels to use and if you want to use the popup and breadcrumb. You can also set the page margins, which will result in a »border« around the content of the page.
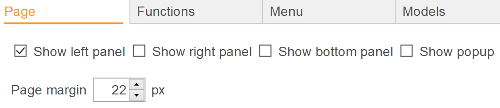
The top panel is always shown, and you can choose how tall it should be, whether to show the search field, and change the logo to one of your own choosing. If you are unsure about the sizes of the panels you can use the preview function at any time to see the result in a web browser.

The information panels also have settings for their initial size but they can be resized in the published material. Since you can toggle them on/off you can also choose whether to show them by default. The final option for the information panels is whether to use them as a document view. This is used for documents that have been marked as being able to be opened within the published material (see Document editor). When you click a link to one of these documents it will be opened directly in this panel instead of opening in a new window. Generally you will only want to designate one of the panels as a document view, otherwise the same document will be opened in multiple views at once.
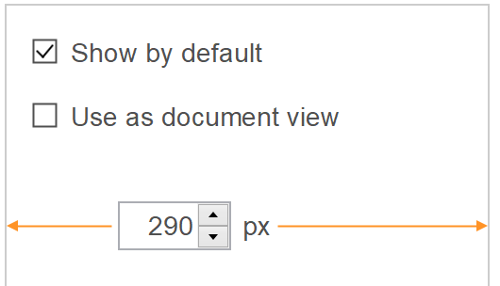
16.2.2.2 Functions
Under »Functions« you control the available functions in the published material.
| Show zoom control | Shows a control that allows the user to zoom in the model. |
| Show layer control | Shows a control that lets the user toggle the currently visible layers in a model. You can choose to show the layers directly as buttons in the toolbar or as a drop-down menu. |
| Show model/object/document prefix | If selected any prefix that has been set will be shown before the title in the published material. |
| Use external search engine | If enabled the search function on the web page can use an additional search engine that has been installed on a 2c8 Modeling Tool Server. |
16.2.2.3 Menu
The top panel contains a menu for quick access to models, objects and documents. Here you can construct this menu by adding menus, sub menus and menu options. The available menu options are:
| List | The result of executing a list. You get to choose which list to use and whether to show the result directly in the menu or in a new popup window. |
| Matrix | A matrix result filtered on the content of this publication. The menu item shows a link that opens the matrix result in a popup window. |
| Model | A link to a specific model. You get to choose which model and optionally a different name for the menu item instead of using the model name. |
| Symbol | A link to a specific symbol. You get to choose which symbol and optionally a different name for the menu item instead of using the symbol name. |
| Document | A link to a specific document. You get to choose which document and optionally a different name for the menu item instead of using the document name. |
| Latest changes | Shows a list of models and objects that was most recently changed. You get to choose how many results to show and whether to show them directly in the menu or in a popup window. |
| New versions | Shows the models and objects that most recently had new versions created. You get to choose whether to show the result directly in the menu and how far back to look. You can choose a specific number of days or models and objects revised since a specific date. Note that this list is created at publication time and will not be updated until you publish again. |
The right side of the menu bar contains a number of function buttons. Below the menu options you can choose which of these functions that should be available. You can also choose which icons to use for these functions.
| Go to start page | Opens the start page. |
| Show/hide panels | Toggles between showing information panels and only showing the model area. |
| E-mail link to model | Creates a new e-mail message with a link to the current model. Note that the link will only work if the models are placed in a location where the receiver can also access it. |
| Print model | Prints the current model. |
| Create report | Creates a report for each model using the selected report profile from the repository. The report will be created in the selected format and when the button is clicked a report generated for the currently active model will be opened in the default program for that file format. |
| Create export files | Creates an export file for each model so that the currently active model can be downloaded in order to be imported elsewhere. |
16.2.2.4 Models
In this section you control which information to show in the different panels for a model, i.e. when no symbol is selected. You can see all the panels that have been marked as used under Page. In each panel you can create one or more tabs. Right click or double click a tab to change its title. To place information in the tabs you grab one of the available fields at the top and drag it to one of the tabs. When a field has been added it will have buttons for removing it again and for editing the field settings. The settings are field specific but all fields has the »Show the field heading« setting which controls whether the heading for the field is shown above its content.
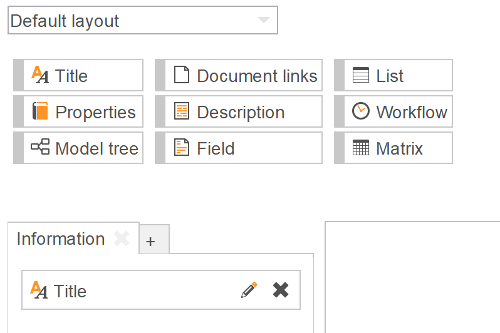
If you wish to you can override the layout for a given model type by choosing a model type in the drop-down and choose »Override«.
16.2.2.5 Symbols
In this section you control the information shown when a symbol is selected. The settings work exactly like for models and lets you override the layout per object types in the same way if you need to.
You seldom need to override the settings per object type. A common misconception is that you need to create a specific layout for example when showing a custom relation that is defined for a specific object type. But since no content will be shown unless it is available for the selected object this is not necessary.
16.2.3 Appearance
This section contains settings that controls the appearance and color scheme of the published models. It has the following settings:
| Page | Color settings for the page background and border. The background color will only be visible if you choose to have margins in the page layout settings. You can also change the background color of the top panel and of models. The model background will fill the entire center panel and will therefore be shown behind both the model and the information panels. |
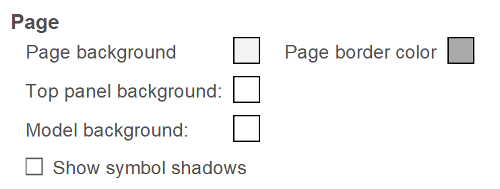
| Selection | When you choose a symbol in the published material the selection is shown with a border and an optional fill color. By default the selection is a black outline and no fill but you can change the color and thickness of the outline and add a color gradient to fill the selection with. If you do not wish to use a gradient you choose the same color in both boxes. |
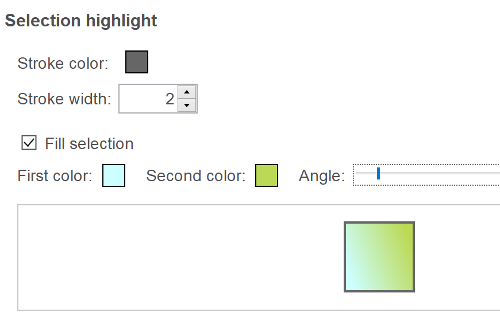
| Icons | Lets you choose whether to show icons on top of objects that have breakdowns or other information such as documents or descriptions. |
The published models use a library with predefined components to show information panels, popups etc. The »Theme« section lets you control the theme used for these components to alter the color scheme and fonts used. There are also a number of predefined themes you can use by choosing »Load theme«. The theme settings are divided into six sections which you choose between in the drop-down list. We will not treat each setting in detail here, the easiest way to use these settings are to experiment with them and use the preview to see the result.
| Text | Font and text color. You can set different font and color for bread text, links, menu options and the heading levels used in descriptions and internal documents. |
| Panels and sub menus | Used for panels in the published material, such as information panels, popups and sub menus. |
| Header for tabs and popup windows | Used for the heading of popup windows and as the background for tabs in the bottom panel if it is used. |
| Clickable areas | Used for tab headings in the left and right information panels and for the menu bar and menu options. It is divided into three parts: standard, active and hover. For the tabs in the left panel standard is used for a tab that is currently not showing, active is used for the current tab and hover is used when moving the mouse over an inactive tab. |
16.2.4 Titles
Since you can switch between languages in the published models you also need to be able to translate all terms and headings used. You do this in the »Titles« section. It contains three tabs for different types of translations:
| Headings | Predefined texts and headings used by the publish functions and fields. |
| Relations | Name of relations between objects. |
| Created | Texts that you as a user have created. For example when adding a new tab to one of the panels you give it a name. This creates a new translation in this table so that you can later control its title in all languages. |
Each column shows a language in the repository. Double click a cell to translate it. You can also right click a cell to copy its value from another language or copy all values for the language from another language.
16.3 Publishing report
To publish models as a report you choose one of the report profiles and press »Next«. Then choose where to publish the models (see Publish destinations). After choosing where to publish the models, select the output format of the report (either Word or PDF). When you click »Publish« the content will be published according to the profile settings and copied to the chosen destination.
All the settings for the appearance of the report are made in the report profile. This includes which content to publish, how to structure the report, fonts etc.
Under »Profile« you can set the name and description of the profile itself and which model to use as the first one shown when opening the report.
16.3.1 Filter
Under »Filter« you choose which models to publish and which layers and languages to include. If there are lists of models saved in the repository you can choose from these under »Saved filter«, otherwise you can create you own filter for which models to include. The settings for the filter works in the same way as the browser search view (see Search view and Model browser filters). The list under the filter component shows the models that will be included in the report.

If you are using workflow (see Maintenance) you can choose »Latest approved versions«. By using this function you can keep working with models but only publish the latest approved versions of the models instead of the work material. If a model is editable and in version »0« it will not be included at all when publishing since there is no approved version of it. If you still wish to include these models you can enable the option »Include models with no approved version«.
By default the models are sorted in reading order. To change this go to the tab »Model order« and check the »Custom order« radio button. You can now change the order in which the models will appear in the report.
If you have been using layers in your models you can choose which of these layers that should be included.
If you have multiple languages in a repository you can choose which language to include under »Languages«.
16.3.2 Layout
On the tab »Layout« you find settings for which information to include in the report and how to format it.
16.3.2.1 Page
The »Page« tab has settings for the page size and margins. You can also specify headers and footers»Remember that the content in the header and footer must have enough space to fit. Word will automatically try to adjust the margins, but the PDF document will place the text as you specify it.«.
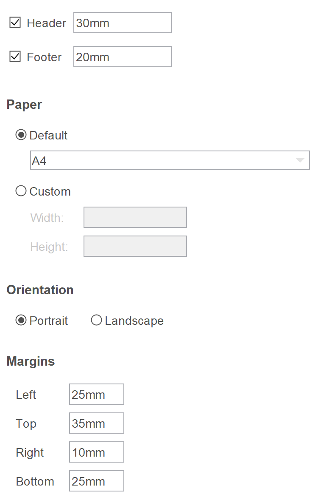
16.3.2.2 Functions
Under »Functions« you can change settings for models, objects and documents.
| Show prefix on models | In the properties dialog for a model, under "Identity", you can enter a prefix for the model. If "Show prefix on models" is checked, everywhere where the model title is shown it will include the prefix. |
| Show prefix on objects | In the properties dialog for an object, under "Identity", you can enter a prefix for the object. If "Show prefix on objects" is checked, everywhere where the object title is shown it will include the prefix. |
| Show prefix on dokument links | In the dialog for documents you can enter a prefix for the document. If "Show prefix on documents" is checked, everywhere where the documents' title is shown it will include the prefix. Note that the default repository configuration does not show prefix for documents. |
| Add models as attachment | Adds all models as attachments at the end of the report. The models are included in the report as well, but with larger versions of the images as attachments. |
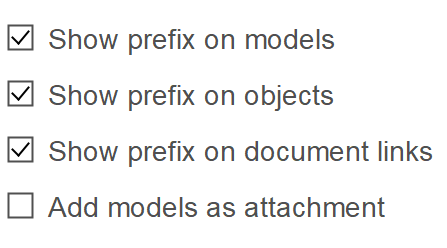
16.3.2.3 Models
Under »Models« you can choose what information to show for each model. The default layout is used for models of all types. By selecting a specific model type and unchecking the »Default« checkbox the information for a specific model type can be changed.
| Title | The model's title |
| Model Image | An image of the model. |
| Documents | A list of all documents connected to the model or connected to objects in the model. |
| Starts with | A list of the business objects that starts the process. |
| Ends with | A list of the business objects that ends the process. |
| Model Contents | A detailed list of the objects in the model. To change the information that is shown for each symbol, see the tab "Symbols". |
| Descriptions and fields | One of the model's descriptions or fields. |
| Version | The model's version. |
| Static text | A static text. |
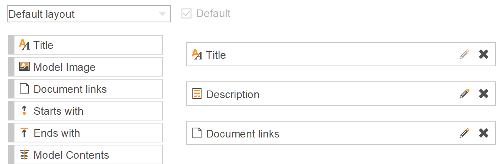
16.3.2.4 Symbols
Under »Symbols« you can choose what information to show for each symbol. The default layout is used for symbols of all types. By selecting a specific symbol type and unchecking the »Default« checkbox the information for a specific symbol type can be changed.
| Title | The symbol's title. |
| Breaks down to | A list of models that the symbol breaks down to. |
| Documents | A list of documents connected to the symbol. |
| Descriptions and fields | One of the symbol's descriptions or fields. |
| Participates In | A list of models that the symbol participates in. |
| Relations | A list of relations connected to the symbol. |
| Version | Symbol's version. |
| Static text | A static text. |
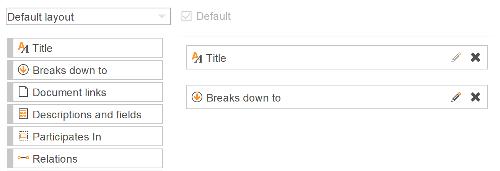
16.3.2.5 Header and footer
Under »Header« and »Footer« you choose what information to show at the top and the bottom of each page.
| Title | Model's title. |
| Version | Model's version. |
| Last changed | When the model was last modified. |
| Last changed by | Who last changed the model. |
| Created by | Who created the model. |
| Page number | Current page number. |
| Static text | A static text. |
| Report date | The date when the report was created. |
| Descriptions and fields | One of the models descriptions. |
| Document title | The document title, taken from the profile's title. |
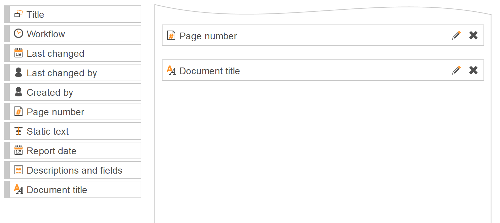
16.3.3 Appearance
Under »Appearance« are settings for typeface, text size and text color for headings and body text. Click on the rectangles to the right to change text color.
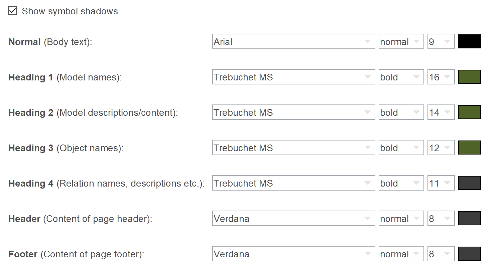
16.4 Publishing to Excel
Publishing to Excel creates a spreadsheet with a tab for each model and a tab containing a summary of all models and objects chosen for publication.
When you choose »Next« you get to choose a start model and which models to include in the spreadsheet.
In the next step you can choose to only include locked versions of models and set the types of descriptions to include in the spreadsheet.
The last step lets you choose what details to include:
| Export summary only | Only publish the summary and no images of models. |
| Include models in summary | By default the summary contains only objects. Enabling this choice will include models as well. |
16.5 Publish destinations
When you have chosen the web profile to use and press »Next« you get to choose where to publish the models to. By default a profile is created for publishing to a location in your home directory. If you want to you can create multiple profiles for publishing to different locations.
A publish destination profile have multiple settings and options but all have in common settings for title and description.
16.5.1 File copy
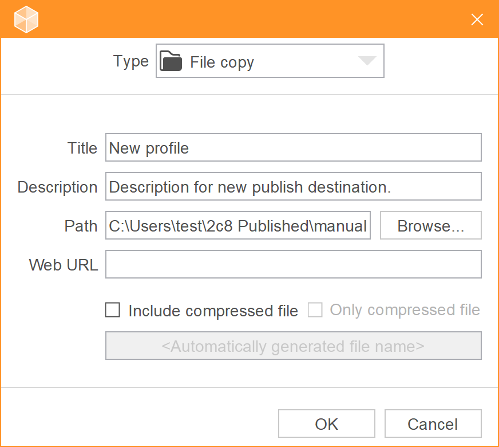
The standard method is to copy the published material to a folder on disk. In 2c8 Modeling Tool this is called »File copy«. The following settings can be configured for a file copy profile, apart from title and description:
| Path | Path to the folder where the published material should be copied. |
| Web URL | Path to published material for the web browser. By default it points to index.html in the folder specified in setting for "Path". |
| Include compressed file | In addition to the resulting files the target folder will contain a compressed zip file containing all of the published files. |
| Only compressed file | If this is selected then only the zip file with the content will be moved to the target location. |
16.5.2 FTP upload
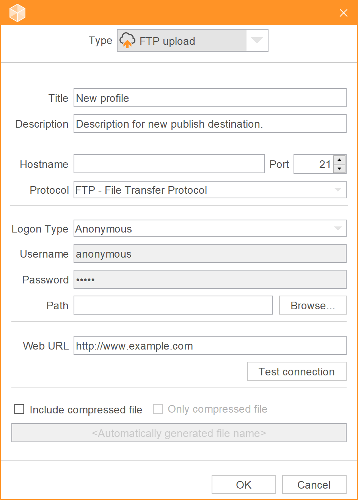
2c8 Modeling Tool is also equipped to upload a publication to a server with FTP and SFTP. A prerequisite for this solution is a properly configured FTP or SFTP server which you have login credentials to. How to install and configure such a solution is beyond the scope of this manual.
The following settings can be configured for a ftp upload profile, apart from title and description:
| Hostname | Address to the server, either as a dns-name or IP. |
| Port | Port number used on the server. Standard for FTP is 21 and 22 for SFTP. |
| Logon type | We provide three different logon types. The first, "Anonymous", should never be used in a live environment as it allows anyone anonymous access to the published material. Disable this kind of access to your server as soon as possible. Next login method, "Normal", is the most common where you specify both username and password. Finally we have "Ask for password", which works as Normal bute the password must be entered each time you make a publication. |
| Username | Username. Can not be edited when logon type is "Anonymous". |
| Password | Password. Can not be edited when logon type is "Anonymous" or "Ask for password". |
| Path | Path to the folder where the published material should be copied. |
| Web URL | Path to published material for the web browser. |
| Test connection | Checks if the FTP server is accessible from where the publication is made. |
| Include compressed file | In addition to the resulting files the target location will contain a compressed zip file containing all of the published files. |
| Only compressed file | If this is selected then only the zip file with the content will be moved to the target location. |
To aid end-users who is consuming published models to know when an updated version of a model has been published the Notifications service can send emails to specific users, also called subscribers. A subscriber is a type of user on the server which serves as a contact providing an email and optionally first- and last name. Subscribers cannot login or use 2c8 Modeling Tool/Lite as ordinary users and do not need a license. Unlike ordinary users, subscribers are globally visible on the server and not assigned to specific repositories. Ordinary users inside a repository however can function as a subscriber. Subscribers (and users) can be assigned to one or more models which means that they are interested to see updates for those models. In this context a model is considered to have been updated when it has been approved (see Missing ref: workflow_states) again since the last time it was published.
To make the task of assigning subscribers to models a little less cumbersome there exist a »group« functionality. A group is simply a collection of subscribers. That group can then be used to subscribe to a model instead of the individual user and when a new subscriber is added to a group it will automatically subscribe to all models which the group is.
17.1 Manage subscribers
Subscribers can be managed (i.e. added,removed and edited) in several locations throughout the application. The primary location however is in the Browser.
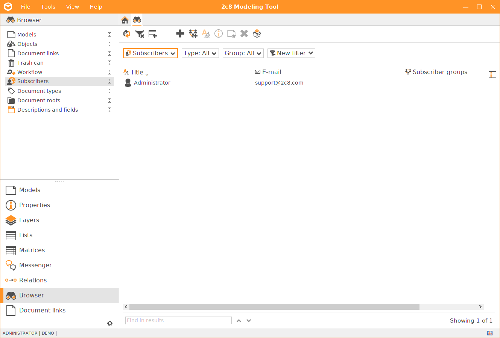
Most of the functionality in this view is either explained in the Browser chapter or is self explainatory, but a few might need some further explaination:
![]() Create a new group. The possiblity to select subscribers that should
be part of the new group exists in the dialog that appear.
Create a new group. The possiblity to select subscribers that should
be part of the new group exists in the dialog that appear.
![]() See which models the selected subscriber(s) is subscribing to and
the option to add models to subscribe to.
See which models the selected subscriber(s) is subscribing to and
the option to add models to subscribe to.
![]() Import subscribers from a CSV-file. Contact books can be exported
as CSV-file from most email clients, such as Outlook. The export file must fulfill the following requirements:
Import subscribers from a CSV-file. Contact books can be exported
as CSV-file from most email clients, such as Outlook. The export file must fulfill the following requirements:
- a header describing which columns that exists
- at least one of the following columns "E-mail Address", "E-mail 2 Address", "E-mail 3 Address", "E-mail 1 - Value" or "E-mail 2 - Value"
- optionally one of the following columns "Given Name", "First Name", "Family Name", "Last Name", "Name" to be able to determine the name for the subscriber. If no such column exists or if the value is empty for a specific row that subscriber's namn is left empty.
17.2 Manage subscribtions
Once subscribers and groups have been created they should be assigned to models. Just as managing the subscribers, this can be done in a variety of places throughout the application:
- The first location has already been mentioned in the previous section (Manage subscribers); in the Browser for subscribers. This alternative is especially convenient when adding from the subscriber's perspective, e.g. a specific subscriber(s) should be assigned to one or more models.
- If we take the opposite perspective and want to add subscribers from the model's viewpoint, there are two alternatives:
- The »Model« view in the Browser.
Select one or more models you wish to assign subscribers to, click on the button
 »Set subscribers«.
 - The »Subscribers« tab under the »Workflow« section in the Properties dialog.
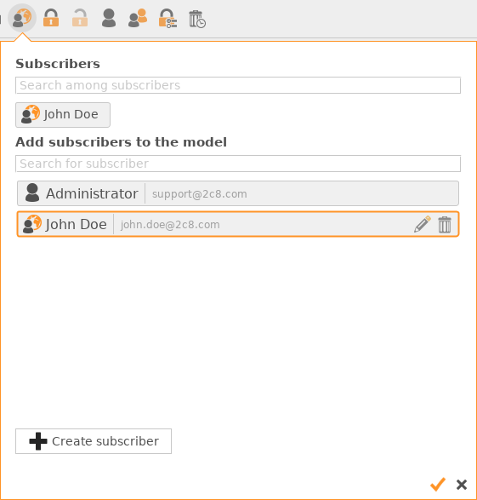
The last two alternatives discussed have a very similar user interface. The dialog is divided into two sections:
| Subscribers | List of subscribers currently subscribing to this model. Click on a subscriber to let him/her unsubscribe. |
| Add subscribers to the model | List of all subscribers. An orange border indicates that this subscriber is subscribing to this model (and should therefor also be visible in the list above). Click on a subscriber to let him/her subscribe/unsubscribe. |
In this dialog there is also the possibility to create, edit and remove subscribers. To make it easier to find a subscriber there is two search/filter fields, one for each section, as well.
17.3 Publish with notifications
As mentioned earlier, the notification service is only available when connected to a 2c8 Server configured to send emails and when publishing using FTP upload. This feature must also be enabled for that FTP upload profile.

It is also very important that the »Web URL« setting is correctly configured since this information is used to redirect the subscriber to the correct location for the published material.
When a model is approved an option »Notify subscribers« exists to give the approver the power to exclude notifications for that specific version of that model. This can be useful if the changes made to the model is minor and therfor not worth sending an email to all subscribers for. The default behaviour when a model is approved is to notify subscribers.
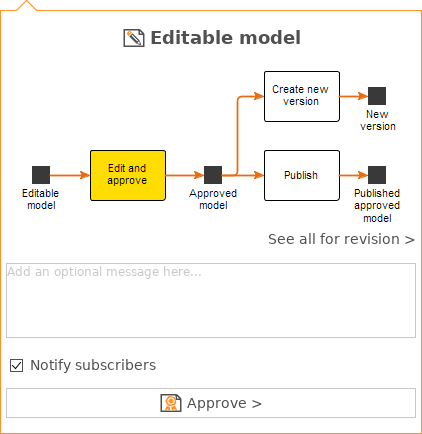
17.4 Receipts
When a publication using a FTP upload destination has completed the notifications service on the 2c8 Server will start to deliver notifications. Once the notifications have been sent one can view their status or »receipt« in 2c8 Modeling Tool. When a subscriber clicks on a link in a notification email it will set the »receipt« as read.
Receipt statuses for a model can be viewed by opening the model's »version history« tab and click on the »Receipts« tab in bottom panel. Notifications sent for that version of the model and their status is shown in a table. A "green check" icon means that the subscriber have opened the link inside the notification email.
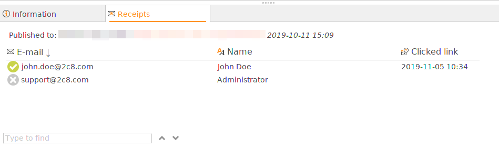
The menu »File/Export« contains options for exporting content from a workspace. The two options »Export current model« and »Export to image« are used to export the currently active model, either to a file that can be imported into another repository or as an image. There are no settings for these choices, just choose the file to save to. The remainder of the chapter covers the »Export content« option which is used to select content to export from a workspace in order to be able to import it into another workspace.
In the first step you choose if you want to export everything or choose manually which content to include. If you choose manual selection another view will be shown before starting the export.
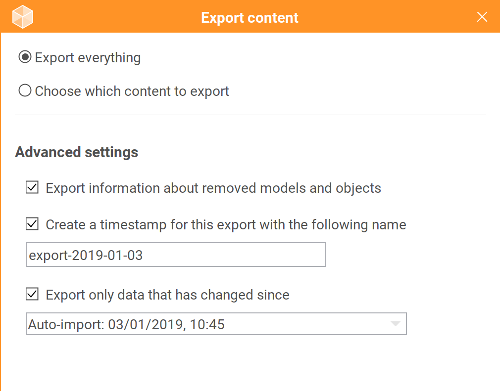
By default the export file contains records of models and objects that have been removed. When importing the file in another workspace you get the choice of removing these models and objects there as well. You can choose not to include this information in the export file at all. Note that this does not include symbols being removed from a model but only objects being completely removed from the workspace.
You can also create a named timestamp for the export. Earlier timestamps can then be used to only export changes made after this point in time.
18.1 Choosing content
The sections to the left show all types of content that can be exported from the workspace. Choose one of them to select which entities of this type to export. Dependencies will always be exported, e.g. objects that are used in a model will always be exported with the model regardless of whether it was chosen under the »Symbols« section.
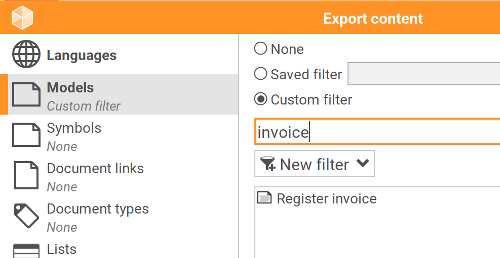
| None | Export no content of the given type. |
| All | Export all content of the given type. |
| Named selection | Use the result of a named selection. A named selection is a selection of content from the repository that has been given a name, such as a list of models or objects. |
| Selection | Manually choose the entities to export. |
In addition to the selection choices there are a number of filters that can be used to filter the current selection.
| Only approved versions | Export only approved versions. |
| Include models with no approved version | Can be used in combination with exporting approved versions to also include models and objects that are in version 0 but have not yet been approved, i.e. when there is no approved version to choose from. |
| Only with status/categories | Export only content with certain status or categories. |
To import content that was previously exported from a repository you choose »File/Import/Import content« from the menu and choose the export file. In the first view shown you can see the content of the export file.
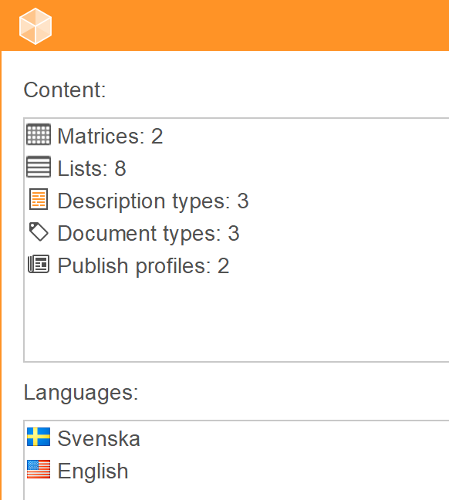
In the next step you choose how to handle content that exist both in the workspace and in the export file. The default option is to overwrite the content if it is newer in the export file. In some cases you might be sure that you want the exact content from the file and in these cases you can choose to always overwrite the current content when it differs.

The »Advanced settings« section gives you finer control of how the import behaves. In most cases you do not need to touch these options.
| Always create new copies of models and symbols | This options can be used to treat all models and objects as new even if they already exist in the workspace. The imported models and objects will be created as copies with new unique ID:s, which means that if you import the same export file again the application will not recognize them as the same models and objects. |
| Conflict management | These settings let you control how to handle conflicts when importing. A conflict arises when changes have been made in both the workspace and the export file and the application cannot automatically decide how to merge these changes together. The default option is to show a new window where the conflicts can be merged manually. You can also choose to always keep the current content in the workspace or to always overwrite with the changes from the export file. |
| Versions | Sometimes the import needs to save changes to models and objects where the current version is locked. The default option when this happens is to create a new version in the workspace and import the changes to the new version. You can also choose to choose manually whether to create new versions in each instance, or to never create new versions and ignore the changes in the export file. |
| Users in export file | The export contains information about which users have created and changed the content. The default setting is to import these users into the new repository if they are missing. Alternatively you can choose to take over ownership of the content by marking all content as created and last modified by your user. |
| Create timestamp | You can create a named timestamp for the import. It can be used later to only export changes made after the import was done. |
19.1 Language settings
If there are multiple languages in the workspace or in the export file a language mapping step will be shown. For each language in the export file you can choose to import it to a workspace language, create it as a new language in the workspace or to not import it at all. The application will suggest a mapping for you based on the flags and names of the languages.
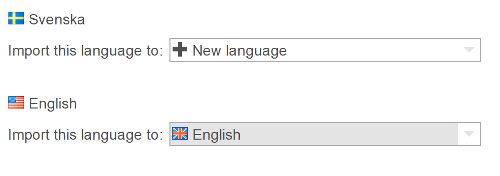
19.2 Layer settings
Much like languages it might be necessary to map layers in the export file to layers in the workspace. For each layer in the export file you can choose what to do with symbols in that layer. The choices available are to create the layer as a new layer and place the symbols in it, to use rules from existing layers to place the symbols, or to place the symbols in an existing layer.
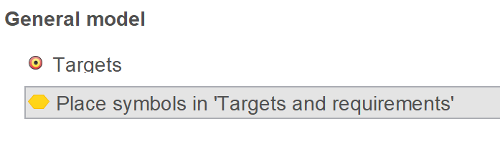
19.3 Removed models and objects
If the export file contains information about removed models and objects and these are available in the current workspace you will get the option of removing them from this workspace as well. Nothing will be removed automatically if not chosen from the list.
19.4 Import view
Before the import starts you will see a summary of the settings that will be used and how languages and layers will be mapped.
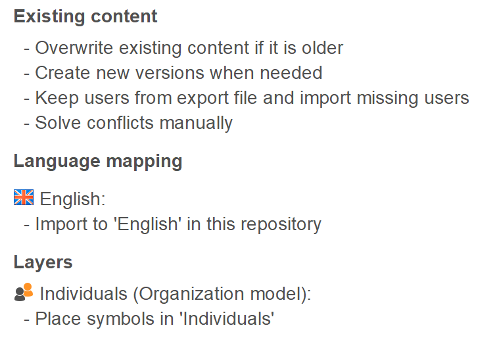
When you choose »Next« the import will start. The »Log« tab will give you a brief summary of the progress of the import.
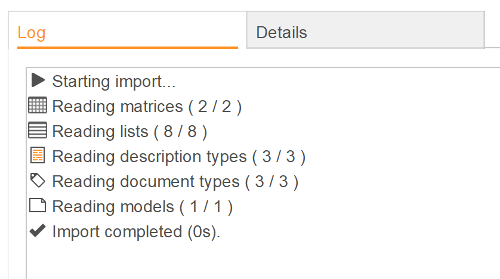
You can see more detailed information under the »Details« tab. For each content type you can see the entities being created and updated, which ones that have been manually merged and which ones that were not imported at all. You can also see any warnings being generated by the import. You can save the entire log to file to be able to see later what was imported by choosing »Save log to file«.
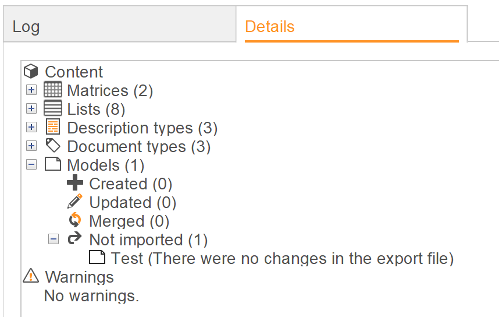
19.5 Merge
When conflicts arise you will have to manually merge them together. When this is needed a window is shown where you can manually pick the changes to include from the export file.
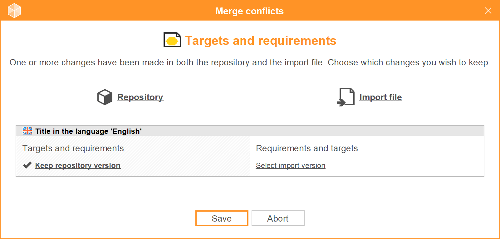
At the top you can see the entity which is in conflict. The changes in conflict for the entity are shown in gray boxes and for each one you can choose to keep the repository version or to overwrite with the value from the export file. The default option is to keep the current values so no changes will be made unless you make an active choice. You can click the »Repository« and »Import file« icons to make a choice for all conflicts at the same time.
When you are satisfied you save the changes and resume the import by choosing »Save«. If you choose to abort the merge instead the entire import will be aborted. The history of imported and merged entities will have been updated so you can resume the import later by importing the same export file again.
You can access the application settings by selecting »Tools/Settings« in the menu. Many of the settings have been addressed in other parts of this manual, but we will describe them briefly here anyway.
20.1 General
| Application language | Switch the language of the application. Requires a restart of the application before taking effect. |
| Automatically check for updates | The application displays a notification at startup if there is a newer version of the application to download. |
| Remember previously opened models | The program saves the list of open models when a repository closes and re-opens the same models the next time the repository is opened. |
| Use international font | Use a font in the user interface that supports more character sets such as Chinese and Japanese. Requires a restart of the application before taking effect. |
20.2 Local
This section contains settings for repositories that are stored locally on your hard drive. The checkbox at the top can be used to disable local repositories altogether.

»Current directory« lets you choose where to place your repositories. If you change the path and save the new settings you will get to choose whether your current repositories should be moved to the new location.
The default local user is only relevant when working against a server. The user in local repositories will always get the first and last name from your license activation, but you can control the username (the unique user ID) of the user. This is useful when you are exporting data from local repositories and you wish the server to understand which user you are on the server when importing. To make this work correctly you should enter the same username you use when logging on to the server.
20.3 Servers
This section lets you manage the servers you wish to be able to connect to. You can add new servers and edit or remove existing servers.
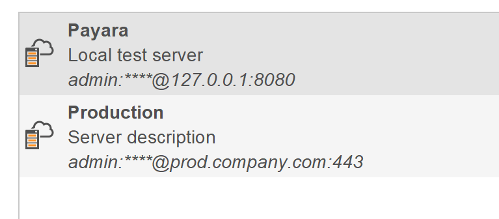
To add a new server click the »Create new server« button and enter the server settings. If your server has not been added automatically in your application profile you should be able to get these settings from your IT department.
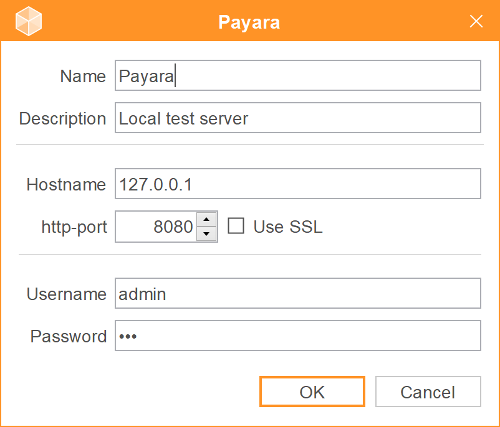
| Name | This is the name that will be shown on the tab showing the available repositories. |
| Description | An optional description of the server. This is only a short text describing the purpose or content of the server. |
| Host name | Host name or IP address of the server |
| http-port | The port that the 2c8 Modeling Tool service runs on. Generally this will not have to be changed unless the port number has been changed due to conflicts with other services running on the server, or if multiple 2c8 servers are running on the same machine. |
| Use SSL | If the server has been setup to encrypt traffic using SSL you need to check this in order to connect to it. |
| Username and password | The username and password you are using to connect to the server. |
20.4 Plugin
Some functionality is available as plugins to the application and is installed separately from the standard installation. Some plugins are free and can be installed at will. Others cost money and in this case you must have the plugin connected to your license in order to be able to install it. Under »Installed« you can see the currently installed plugins. Here you can search for available updates to installed plugins and uninstall existing plugins. You can also edit any settings the plugins might have. Under »Available« you can see the plugins available for installation. Select a plugins and click »Install« to start installing it. Some plugins might also have a »More info...« option that redirects you to a web page with more information.
Under »Settings« you find settings for how to handle plugins to the application.
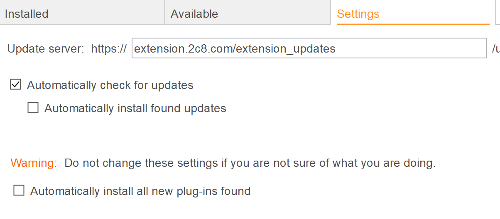
| Update server | The list of available plugins is fetched from an update server maintained by 2c8. It is possible to replace this with your own update server in order to control the available plugins and which versions of these to use. |
| Automatically check for updates | The application will automatically check for any available updates to installed plugins on startup. |
| Automatically install found updates | When new updates are found these will automatically be installed without asking the user. |
| Automatically install all new plugins found | This option will cause all available plugins to be installed. You will probably only want to use this option if you have your own update server where you can control which plugins will be installed. |
If you have changed the update server you can click »Save and (re)connect« to update the list of available plugins using the new update server.
20.5 Proxy
If you connect to the internet through a proxy you will have to enter the proxy settings here in order for 2c8 Modeling Tool to be able to use web-based services such as checking for updates, downloading plugins etc.
| Use proxy | Controls whether any proxy settings will be used when connecting to web services. |
| Host and port | The host and port of the proxy server to use. If these are left empty 2c8 Modeling Tool will try to use any system-defined proxies available. |
| Username and password | The username and password to connect to the proxy server with. |
| Non proxy hosts | This setting lets you add addresses for which the proxy should not be used. You can add multiple addresses by separating them with "|". |
A repository in 2c8 Modeling Tool has a configuration which, among other things, determines which model types, object types and types of relationships that can be used and where. Situations may arise when there is content in a repository that violate the configuration, e.g. after an import from another repository, or if you have applied a new configuration. You can then run a validation of the configuration by selecting »Tools/Validate...« from the menu. You must first choose which of the models to be validated and when validation is completed, a list of deviations from the configuration is shown.
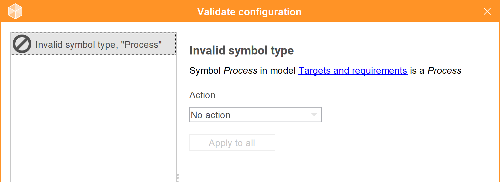
In the example above, the symbol types »Process« and »Activity « are used in a model that does not allow it. Under »Action«, you can choose how you want to do to fix the error.
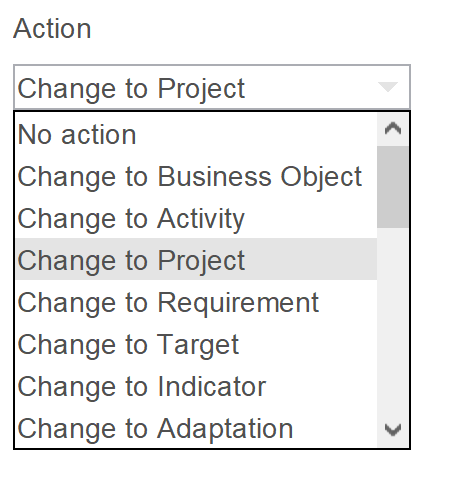
In the example with an invalid object type, you can choose to change the object type to a type that is valid in the model or to remove the object from the model. When you have chosen an action, you can also use the »Use for all« to choose the same action for all similar errors. When choosing »Apply« all the actions are applied and a second run of the validation is executed in the current models. The reason for this is that a choosen action could lead to another deviation from the configuration in another model.
2c8 Server functionality allows multiple users to work with your models in 2c8 Apps. You can also create groups containing many users on the server. We highly recommend creating groups of users to ease the management of users on the server.
You create users and groups in 2c8 Portal. These are later synced to your 2c8 Server where they'll be available under »Users and permissions« . In 2c8 Portal, you administrate users, licenses, and products. What permissions you have in 2c8 Portal depends on if you're a portal administrator or not. Everything you need to know about 2c8 Portal you'll find here.
In 2c8 Modeling Tool you manage users and groups created in 2c8 Portal and that has been synced to your 2c8 Server. The synchronization is automatic. To manage users and groups in 2c8 Modeling Tool, you need to be an administrator user. Everything you do under »Users and permissions« in 2c8 Modeling Tool is bound to repositories. This means that you first and foremost give users and groups access to repositories, and then give them the privileges and group permissions they should have in their repositories. There are no server-wide settings regarding users and groups in 2c8 Modeling Tool, only on a repository-level. The server-wide settings regarding users, groups, and permissions are made in 2c8 Portal. In this chapter, you can read all about the settings under »Users and permissions« in 2c8 Modeling Tool.
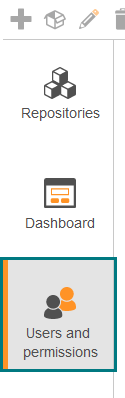
22.1 Users and permissions
| Users | Users on the server. |
| Groups | Groups on the server. |
| Repositories | Repositories on the server. |
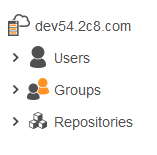
22.1.1 Give users and groups access to repositories
Users on the server do not have automatic access to all the repositories on the server (except administrator users), since they are not always supposed to. This means an administrator user on the server needs to give users or groups access to repositories. Start by clicking on »Users and permissions« in 2c8 Modeling Tool.
| Give users access to repositories |
Fold out »Users« and then »Repositories« . Under »Repositories« fold out »Access«. Grab the user out of the list »Users« , drag and drop it onto the tab »Access« to give the user access to the repository. The user now have access to the repository and it's visible in the users dashboard in 2c8 Modeling Tool. If it is a 2c8 Lite user, the user can now be assigned as a maintenance role for the models in the repository.
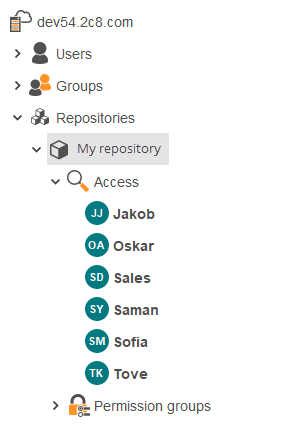
| Give groups access to a repository |
Fold out »Groups« and »Repositories« . Under »Repositories« fold out »Access«. Grab the group out of the list »Groups« , and drag it to the tab »Access« to give the group access to the repository. You have now given all the users in that group access to the repository you've chosen.
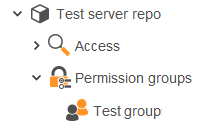
One of the perks of adding users to groups in 2c8 Portal is that you can give entire groups access to repositories. This means you won't have to add the users one by one.
To see which groups or users that have access to a repository you can fold out the tab »Repositories« ,and then fold out the repository in question and then the tab »Access« . This is where you can see a list of users and groups that has access to the repository.
If you wish to remove a user or a group from the repository you click on the user or the group under the tab »Access« and then click the button ”Remove from repository”.
22.1.2 Privileges for users and groups
You can set privileges for both users and groups in a repository. The privileges decide what the users can do in a repository. These settings at made under the tab »Repositories«. Choose the repository where you want to set privileges for users or groups. Fold out »Access« and then click on the user or the group where you want to set privileges.
The different privileges are as followed:
| Manage users in a repository | Allow the user to administrate other users in a repository. As an administrator user, you can connect a user to a repository and then give them this privilege to let them manage other users in that specific repository. |
| Create, edit and remove language | Allow the user to create and edit languages in the repository. |
| Manage lists in the repository | Allow the users to create and edit lists and custom relations in the repository. |
| Manage layers in a repository | Allow the users to create and edit layers in the repository. |
| Create workspace | Allow the users to create new work spaces in a repository. This option is only relevant if you are using version management. |
| Create snapshots | Allow the users to create snapshots (locked work spaces). This option is only relevant if you are using version management. |
| Throw out other users from the repository | This could be useful for different operations, such as creating a new language. If you do not have this privilege you have to wait until no one is working in the repository before you create the language. |
| Export data from the repository | Allow the users to export data from the repository in the form of an export file. |
| Publish data from the repository | Allow the users to publish data in the repository, either in HTML, PDF report, or Word report. |
| Manage field types in the repository | Allow users to edit field types in the repository. |
| Lock/unlock prefixes in the repository | Allow the users to lock and unlock prefixes on models and objects in the repository. Users without this privilege can not change locked prefixes. |
If a user is added as a single user but also belongs to a group, the privileges from the group and the single user is merged.
22.1.3 Settings for permission groups
For every separate repository, you can set permissions for different groups. The permission groups are completely separate from the groups accessing the repository. This means you actively need to add permission groups under the tab permission groups. To put it briefly, permission groups revolve around access control of models and objects in a repository belonging to different groups. You can find the settings for permission groups under the tab »Repositories« ,fold out the repository in question, then the tab »Permission groups« , and click on the group you want to set permissions for.

The settings for permission groups are as follows:
| Edited by group | Only users included in the same group as the model belongs to can edit it. Users not included in the group can only read the model and not make any changes to it. . |
| Group private | Only users included in the same group as the model belongs to have access to the model. Users not included in the group do not have access to the model, so they can't read or edit the model. |
| No access control | All users and groups in the repository can read and edit models created by the group. |
Click on the »Remove from repository« button if you want to remove the permission group from the repository.
This chapter contains information regarding permissions for models, objects, and document links. This chapter is therefore only relevant if you are using permission groups on your server. If you would like to know more about the settings surrounding permission groups you can read chapter 22.1.3 "Settings for permission groups" .
23.1 Group membership in a repository
When you open a repository using permission groups, you can see what group you are currently working in by looking at the bottom left corner of 2c8 Modeling Tool. If your user were to be a part of multiple groups, you can choose which group you want to work in for the moment. The group you are currently working in is relevant for read and write permission on models, objects, and documents you create but also what parts you are going to see and edit in the repository.
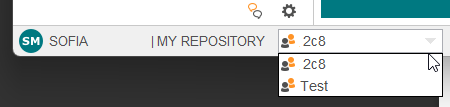
23.2 Permission settings of new models, objects, and documents.
When you create a model, an object, or a document, they automatically belong to the group you were working in at the moment they were created. The model, object, or document inherits the settings the permission group was ascribed under »Users and permissions«. This means that if you are a part of, and currently working in, the group "Economy" with the permissions »Edited by group«, the models, objects, or documents can only be edited by members of the group "Economy".
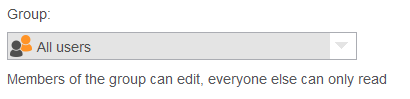
In 2c8 Apps you can manage changes in models by using version management and also distributing the responsibility using maintenance roles. The maintenance of models is managed in both 2c8 Modeling Tool and 2c8 Lite, but also in the web app 2c8 Approve.
With version management in 2c8 Apps you can see previous versions of models and ensure the quality of your published material. If you have not set any maintenance roles on a model you can choose to approve a model anyways in the toolbar. The model is then locked for editing and you need to create a new version of the model to edit it.
In this chapter, we are going to go through everything you need to know about the maintenance of models.
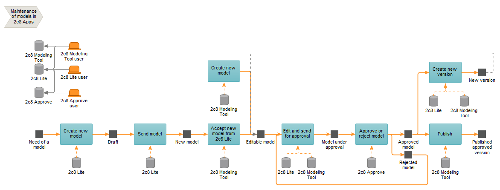
24.1 Maintenance roles
In 2c8 Modeling Tool, you can set different maintenance roles for your models. This way, you distribute the responsibility for modeling, reviewing, and approving your models.
| Modeler | The modelers' role is to edit the model, for example, add description texts, new objects, and add documents. |
| Reviewer | The reviewers' role is to review the model and the information it contains. This role ensures that the model is described correctly, purely methodologically. |
| Approver | The approvers' role is to either approve or reject a model. The approver of the model is the one deciding whether the model describes reality correctly or not. |
A »Modeler« is either a 2c8 Modeling Tool-user or a 2c8 Lite-user. This role is the one doing the actual changes in a model. When the changes are made, the model is sent via the »maintenance flow« to a »Reviewer« and »Approver« " to be reviewed and approved. The reviewing and approving of models is something performed in the web app 2c8 Approve. Users of 2c8 Modeling Tool and 2c8 Lite have automatic access to 2c8 Approve.
24.2 Set maintenance roles
You can set maintenance roles in two different ways. You can either do it under »Properties« on a model, or via the maintenance view in the browser by clicking »Tools« - »Maintenance«.
Set maintenance roles via the properties dialogue.
Right-click on an empty surface of the model. Choose »Properties« and then »Maintenance roles« in the left panel of the properties dialogue. You can now see a view where you can set maintenance roles for the model. Click on the tab »Modeler« and then the button »Add modeler«. A list of users in the repository will appear. Choose the user who's supposed to be the modeler of the model. Do the same with Reviewers and Approvers by clicking on the tabs »Reviewer« and »Approver«. Note that a model can have multiple Modelers, Reviewers, and Approvers.
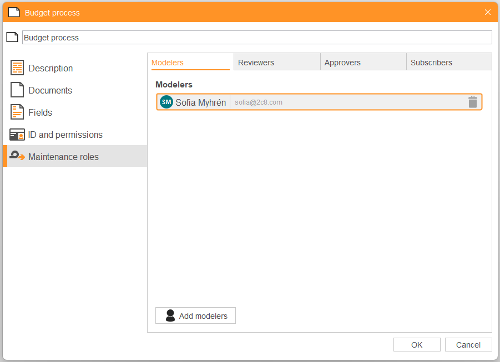
Set maintenance roles in the maintenance view of the browser
By clicking on »Tools« and then »Maintenance« in the menu of the software, a maintenance view in the browser will appear. This view gives you an oversite of the maintenance roles of your models in the repository. You can also set maintenance roles for your models via this interface. Highlight one or more of the models you wish to set maintenance roles for, and then click on the maintenance figures in the toolbar. This is where you can choose to set Modeler, Reviewer, or Approver for your models. Note that one model can have multiple Modelers, Reviewers, or Approvers.
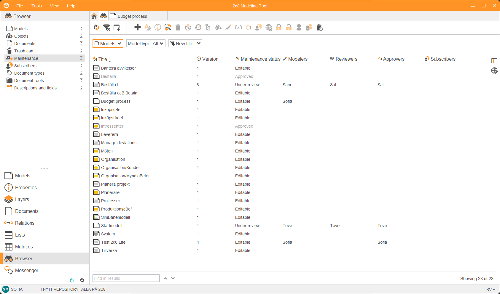
24.3 Maintenance states
The maintenance flow of a model consists of six different states, where each state describes where in the flow the model currently is.
| Draft | Drafts are new models created in 2c8 Lite. In this state, the model does not yet belong to a repository. The model may not even have the correct model type and is simply a draft. |
| New model | A new model is a draft that has been sent from 2c8 Lite to 2c8 Modeling Tool. The model is awaiting placement into a repository where it belongs in a more extensive structure and is given a model type. The difference between a draft and a new model is that a draft is working material, and a new model is a model that has been sent to a 2c8 Modeling Tool user. To receive a draft sent from 2c8 Lite, as a 2c8 Modeling Tool user, you need to have the permission "Accept drafts" checked on your user. This is a setting in 2c8 Portal. |
| Editable model | An editable model is a model that has been placed in a repository and given a model type. All new models created in 2c8 Modeling Tool are by default in this state of the maintenance flow. A model that has been previously approved and later unlocked for editing (a new version has been created) is also in this state. To put it shortly, models in this state can be edited by both 2c8 Modeling Tool users and 2c8 Lite users, given that the 2c8 Lite user is set as the maintenance role |
| Under review | In this state, the Modeler has sent the model to a reviewer. The model is no longer editable and is awaiting a reviewer to review the model. The review of the model occurs in 2c8 Approve. |
| Under approval | In this state, the modeler or the reviewer has sent the model to be approved. The model is no longer editable and is awaiting the approver to approve the model. The approval of the model occurs in 2c8 Approve. |
| Rejected | In this state, a model sent to be reviewed/approved has been rejected. This state is equal to an editable model and indicates that the model has been rejected. |
| Approved model | A model is approved once an Approver has decided it correctly describes reality and approves the model. An approved model cannot be edited, with the exception that you allowed small changes to approved models (see |
24.4 In which state is the model?
Models are stamped with an icon in the top right corner, indicating which state the model is currently in. This stamp will not be visible in the published material or when exporting your model to an image. The following icons and colors are used:
 Draft (only visible in 2c8 Lite)
 Under review
 Under approval
 Rejected model
 Approved model
If the user does not have permission to make changes in the model, this is also visible in the top right corner and is indicated by a lock. This can be visible regardless of which state the model is in.
 No write permissions
24.5 Maintenance responsibility
There are four areas of responsibility in the maintenance cycle that applies to 2c8 Modeling Tool. The individuals responsible for receiving drafts sent from 2c8 Lite are called »Repository organizers«. The individuals responsible for making changes to models are called »Modelers«. The individuals responsible for reviewing the content and form of models are called »Reviewers«, and finally the individuals responsible for approving models are called »Approvers«. A 2c8 Modeling Tool user can be both reviewer and approver, but approving and reviewing models is done in 2c8 Approve.
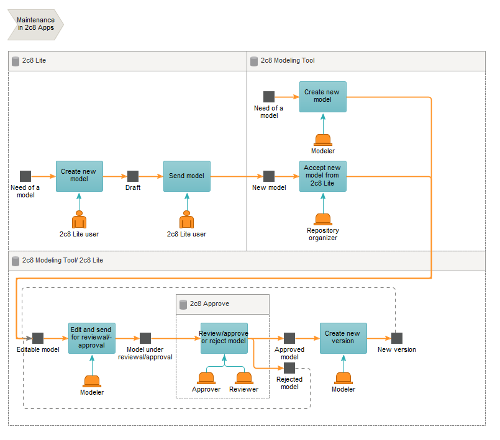
24.6 Working with maintenance
To pass a model through the maintenance flow, you use the »Maintenance flow button«.
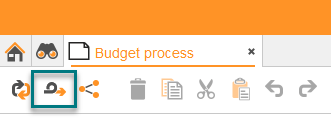
This will open a dialogue showing where in the maintenance flow the model is and a button taking it to the next step. The dialogue also shows the message submitted when the model last changed maintenance status. To pass the model to the next status of the maintenance flow, enter a message in the text box if needed, and click the button representing the next status in the maintenance flow. For example, there is only one button called »Send for approval« in the figure below, which will bring the model to the next status, »Model under approval«. In this example, the model will end up at the elected Approver, who will approve or reject the model in 2c8 Approve.
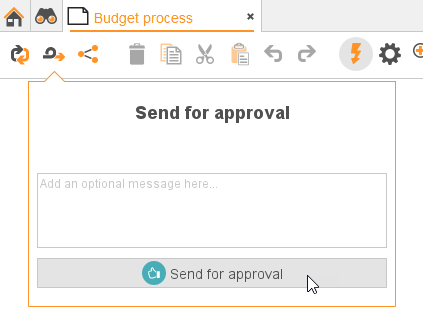
24.7 Organize drafts sent from 2c8 Lite
Models created in 2c8 Lite are not yet located in any repository and are therefore not part of any structure. To let 2c8 Lite users contribute with their models in a repository, they need to be sent to a repository organizer with 2c8 Modeling Tool. Every model created in 2c8 Lite is a draft, and once the user clicks on the maintenance button in the toolbar, they can send the model to a repository organizer. The repository organizer has to add the model to a repository, give it a model type, and, if wanted, set maintenance roles for the model. Repository organizer is set as a permission for users in 2c8 Portal called »Accepts drafts«. If no repository organizer is set, 2c8 Lite users can send their models via email.
Repository organizers manage drafts in the »Dashboard«. You can reach the dashboard in the toolbar of 2c8 Modeling Tool. In the box »New models from 2c8 Lite« you can see all the drafts waiting to be placed in a repository. If you choose a model and click on »Move to maintenance«, a guide showing how to import a draft will appear.
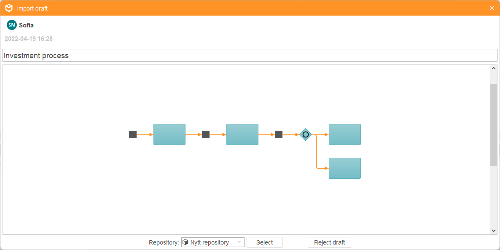
If you want to reject the draft, the model will be sent back to the 2c8 Lite user without ending up in a repository. Click on »Reject draft« and write a message to the 2c8 Lite user explaining why the draft was rejected. The message will follow the model through its life cycle and will be visible to future modelers.
If you want to organize the model into a repository, choose a repository in the drop-down menu and click "Select". This will bring you to a finishing step where you select the model type and set maintenance roles for the models.
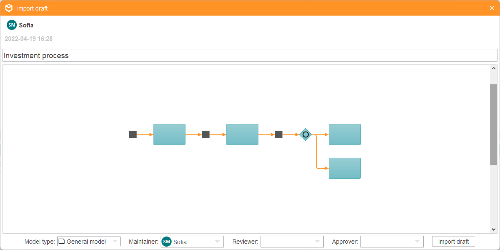
It is not crucial to select maintenance roles for the model in this stage since you do not always know which user will have which role. You can always change the maintenance roles once the model is in a repository.
Click on »Import draft« to finish the import.
24.8 Summary of the maintenance cycle
The maintenance cycle is the process that brings a model through the different stages. The process starts either as an editable model in 2c8 Modeling Tool or a draft in 2c8 Lite. For the parts of the cycle relevant for 2c8 Lite we refer to the manual for 2c8 Lite.
A model starts its cycle as an »Editable model« in 2c8 Modeling Tool. A Modeler can edit the model by changing the flows, adding symbols, documents, descriptions, and so forth. This happens during the activity »Edit and send for reviewal« which is finished by the modeler sending the model for reviewal. The model is then brought to the stage »Under review« and a new activity is started, where the responsibility transfers to a Reviewer.
During the activity »Review and send to be approved« the Reviewer reviews the model. The reviewal of the model happens in the web app 2c8 Approve by the individual set at Reviewer of the model. There are two choices: accept the model and send it to the state »Under approval« or decline it and send it to the state »Rejected«. In the latter mentioned choice, the model is sent back to the Modeler, which can make the changes necessary and send it to be reviewed again.
The activity »Approve or reject« « includes an Approver examining the model and deciding whether the model describes the reality correctly or not. As mentioned earlier, the approval of a model occurs in the web app 2c8 Approve. There are two possible ways to go: the model is either approved and moved to the state »Approved model« or rejected and moved to the state »Rejected«. In the latter case, the model is sent back to the Modeler, which can edit the model and make the necessary changes to be reviewed/approved again. An approved model is locked for editing and is considered an accurate description of reality.
Approved models are passed through the maintenance flow by the activity »Create new version« which will bring the model back to the state »Editable model«, and the cycle starts over.
Note that it is not always necessary to send models for approval or reviewal. Which states are used depends on which sort of responsibility has been distributed for the model. For the most effortless possible maintenance where you only want to keep track of the different versions of a model, you can pass through the maintenance flow without an Approver or a Reviewer. The Modeler can then approve the model straight away and create new versions when needed. The image below shows the maintenance flow without a Reviewer.
24.9 Allow changes in approved models
If you are in need of making changes to an object that is included in one or many approved models you will have to create a new version of all the affected models. If you for some reason don't want to do this, but to change the object in the approved versions of the models you can activate the function »Edit locked revisions« in Administration Tool. This allows administrators and users with the privilege »Edit approved versions of models and objects« to make changes to an object included in approved models, without having to create a new version of the models.
Each time you open a repository in 2c8 Modeling Tool you are actually opening a »workspace«. When you create a new repository a default workspace is created. If you don't use version management you don't need to care about workspaces, you can just use the default one.
A common use for workspaces is to archive approved models. To do this you right-click a repository and choose »Workspaces«. The click the button »Archive approved models«. This will create a new workspace under »Archived material« that contains all the approved models in the initial workspace. You can use the »archive workspace« to view the state of the approved models at this point in time or create a new workspace based on this workspace to keep working with the models.
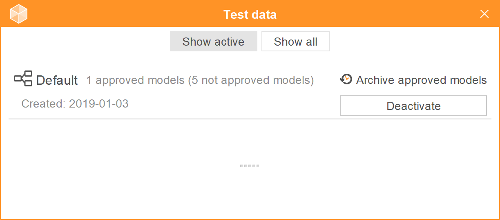
To open a workspace or archive you click its name. In a archived workspace no changes can be made when it is opened.
It is also possible to create multiple workspaces from an archive. By using parallell workspaces you can handle situations where there is material that might not be included in the main track. You can then use the export/import functions to merge changes made in one workspaces to another workspace. (see Export and Import).
2c8 provides a method for modeling, analysing and developing organisations. This method is applied and integrated in 2c8 Modeling Tool with support of a set of model types, object types and relation types. By installing extensions to the application you can also add to this set by allowing for example process automation or information modeling.
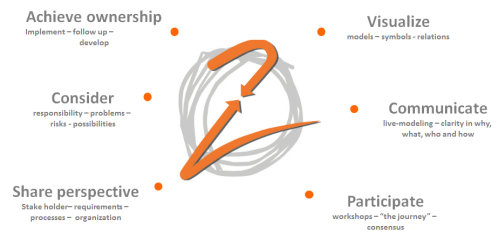
26.1 Model types
This section describes the model types available in 2c8 Modeling Tool and their applications.
26.1.1 General model
When the other model types are not enough the general model can be used as an alternative or complement. General models are used for different purposes, for example to:
- Provide a holistic picture where other model types are not applicable
- Define problems, risks and possibilities
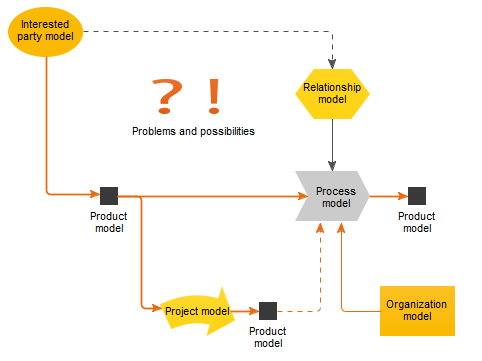
26.1.2 Interested party model
The interested party model is used to visualize the relationship between the business and surrounding customers, suppliers, partners, employees, owners etc. These models are the basis for balanced requirement management.
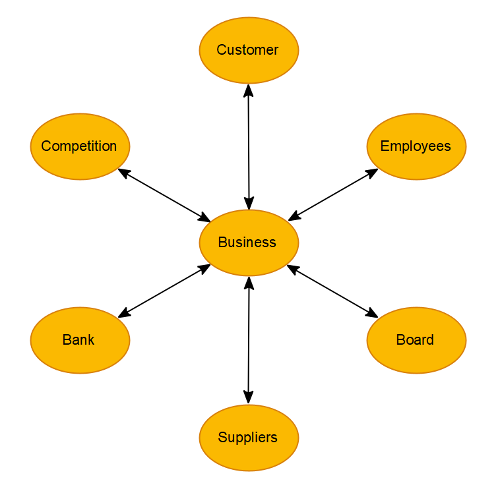
26.1.3 Relationship model
The relationship model describes relations between parts of the business and is used for example to describe the relation between interested parties and requirements.
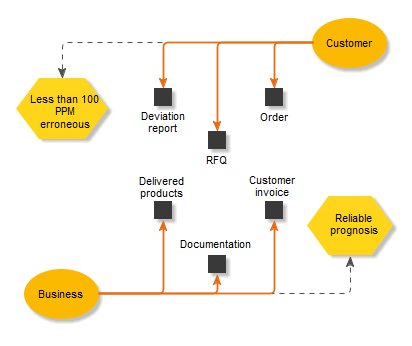
26.1.4 Process model
The process model is used to describe processes containing sequences and structures. The models are continually improved by answering the questions »What«, »How«, »Who«. The graphical language follows »Integration Definition for Function Modeling (IDEF0)«.
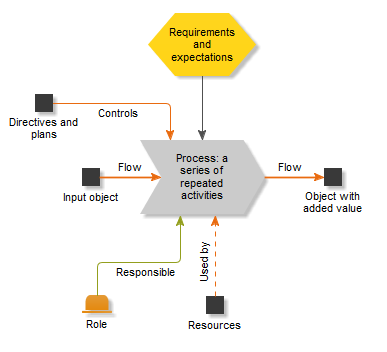
26.1.5 Product model
The product model is used to visualise services by modeling products and offerings. These are called »business objects«.
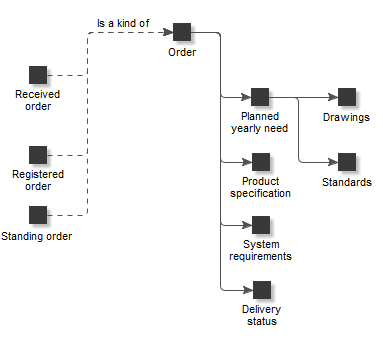
26.1.6 Project model
The project model is used to visualise requisites and starting points and internal relations for change projects.
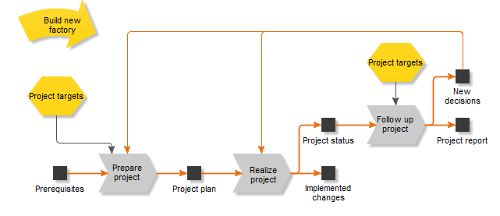
26.1.7 Organisation model
The organisation model is used to visualise how resources and competence profiles are developed and staffed.
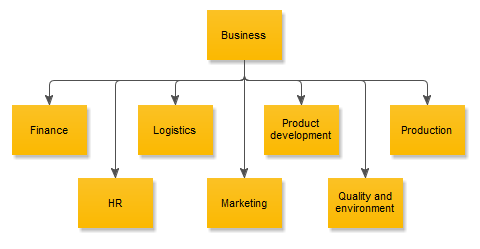
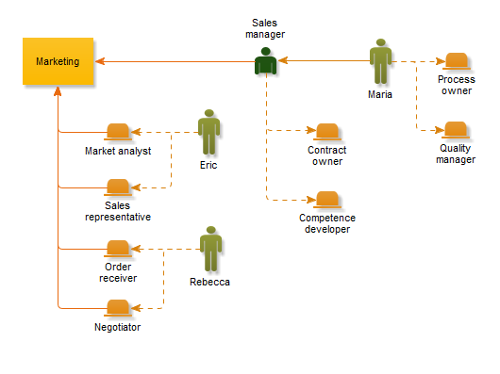
26.1.8 Application model
Application models are used to describe the structure and collaboration between components in an application or system.
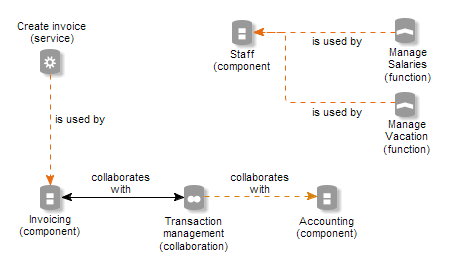
26.1.9 Swimlane model
Swimlane models are used to group objects in »swimlanes« and visualise relations between the swimlanes and the object they contain. A common application is to visualise processes and then place these in swimlanes showing the organisatorial unit or role responsible for these processes.
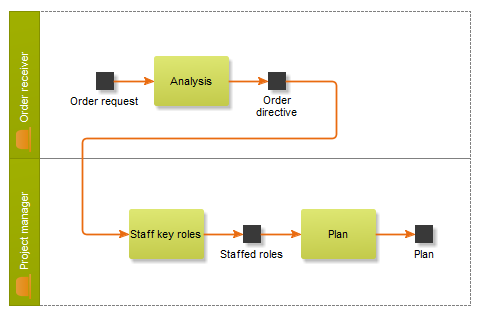
26.2 Object types
This section describes the object types available in 2c8 Modeling Tool and their applications.
26.2.1 Business object, document, message and tool
The business object is a resource or improvement in the form of a physical resource or an information packet. Sometimes a business object can be used as an abstract entity related to a process, for example »Need for additional information«. The business object is named with a noun and often includes an adverb to describe its status, such as »Registered order« or »Available resources«.
Business objects can be specialized as other object types:
| Document | If the object is a document. |
| Message | If the object is an electronic message. |
| Tool | If the object is a physical resource/equipement that is used by a process/activity. |
26.2.2 Process

A process is a repetitive activity that can be cross functional and measurable and that performs some activity. The process is used at different levels of detail, from a high and general level down to the detailed level. The process is named with a verb in infinitive and a noun describing what is happening, for example »Build cars«, »Bake bread« or »Print documents«.
26.2.3 Activity

An activity describes a planned activity within a process and always have a responsible. The activity inherits its input from the process it is part of. It is part of a detailed level of a process. The name should reflect the activity with a verb and the object involved. A strict standard is recommended, for example »Register order«.
26.2.4 Requirement

A requirement is a specific property defined for a process, business object or role, expressed by an interested party, organisation or process. A requirement is named by showing a direction or level of a specific property such as »improved delivery precision«, »less waste« etc.
26.2.5 Target
A target expresses a future desirable state. Targets can be formulated for organistaions, units, processes, projects, individuals etc. They can either be short term or long term. They should generally consist of a set of important characteristics which can be described with the SMART model: »Specific«, the target should be concrete and specific. »Measurable«, it should be expressed in a way that it can be measured. »Accpeted«, the target must be perceived as relevant by all parties involved. It must also be »Realistic« and »Time constrained«.
26.2.6 Indicator

An indicator shows the current outcome of a target or key indicator.
26.2.7 Adaptation
Shows for example customer adaptations and customisations.
26.2.8 Gateways (And/Or) and Join
A gateway is used when an activity is followed by two or more activities. If more than one of the following activities can be performed then the »and« variant is used. If only one activity should be chosen the »or« variant is used. »Join« can be used when a previously split flow goes back together. It should then be interpreted as waiting for all previous activities being completed before resuming.
26.2.9 Role
A role is a competence or responsibility derived from a need in a process, project, forum, or an IT-system. For example, »project member«, »chairperson«, »system administrator«. It can vary between organizations weather a person’s title is a position or role. For example, »Software developer«, »project manager«, »supply manager«.
26.2.10 Position
A position is the title of what someone is hired as. A position can be responsible for or belong to an organizational unit and the position can consist of one or more roles. A position could be for example »CFO«, »financial assistant«, »software developer«, »CEO«. It can vary between organizations weather a person’s title is a position or role. For example, »Software developer«, »project manager«, »supply manager«.
26.2.11 Interested party

An interested party is a person or group that has a relation with and has requirements on the organisation, or that the organisation has requirements on. There are often two-way relations between interested parties. An interested party can also be depicted as an external group that performs a task in a process model. It is always named by its official name, e.g. »Acme Ltd.« or by a group name such as »Supplier«, »Owners« etc.
26.2.12 Forum

A forum is a group of people with a predefined purpose and responsibility. Examples of purposes can be to exchange information, solve problems, make decisions, and follow up results. Typical forums are management, control group, product council etc. The workflow of a forum is often meetings, prepare, realize, communicate. The meeting needs input and will create outputs. The forum usually has relations to other forums, positions, roles etc.
26.2.13 Organisation

Used to specify an organization or department/unit/section with resources in the form of Positions, Roles, and Individuals. An organization is usually named based on the function where resources with similar competences is found. E.g. »finances«, »sales«, »planning«.
26.2.14 Individual

An individual is a real specific individual and is named with the individual's personal name. An individual is empowered a Position, including the Roles that the position consists of. Roles can be related directly to an individual with the relations Is Empowered or Can Play.
26.2.15 Project

A project is used to describe a specific project. A project has a defined beginning and ending with a measurable goal and a set budget. The project is named what it is named in the organization. E.g. »Develop new offerings« or »Project Via Appia«.
26.2.16 Application and archive
An application is an information system that supports a process or activity. It is often used in process and application models. Archive is used when the support is an archive of some kind.
26.2.17 Problem, possibility, risk, strength, weakness, note
Problems, possibilities, risks, strengths, weaknesses and notes are notations used for general or specific possibilities and problems of interest. Often used when improving or analysing a model.
26.2.18 Time
The time object is used to show dates or times when processes or activities should be performed, alternatively when a business object should be available.
26.2.19 Location
A physical location.
26.2.20 Text
Used to show text directly in the model. The text object shows the description of the object instead of its title, which makes it possible to show formatted text, images and links, (see Text objects and web components).
26.2.21 Web component

Used to show content from another web site. The content is not shown in 2c8 Modeling Tool but when models are published to web pages (see Text objects and web components). The size of the symbol controls the place taken by the content on the web page.
26.2.22 Collaboration
Two or more application components collaborating. A collaboration »Transaction management« could for example provide functionality through collaboration between the components »Invoicing« and »Accounting«. Is named by a noun.
26.2.23 Component

A modular and interchangeable part of a software system that encapsulates behaviour and data, and exposes these through a collection of interfaces. The components »Invoicing« or »Accounting« could be components in a business system. Is named by a noun.
26.2.24 Interface

An access point where a service is made available to a user or another component. The interface »Transaction management« could be available on the component »Accounting« to provide functionality for transactions. Is named by a noun.
26.2.25 Function

Groups automated behaviour that can be performed by a component. The functions »Manage salaries« and »Manage vacation« could be examples of functions in the »Staff« component. Is named by a verb.
26.2.26 Interaction
Describes the collection of functionality built through a collaboration. An interaction »Manage invoices« could be used to describe what is made available through the collaboration »Transaction management« between the components »Invoicing« and »Accounting«. Is named by a verb.
26.2.27 Service

A service that exposes automated behaviour. The service is realised through functions provided by components. The service can be used by processes or functions. The service »Create invoice« could use the function »New invoice« of the »Invoicing« component. Is named by a verb.
26.3 Relation types
This section describes the available relation types in 2c8 Modeling Tool. A few of the relations are each others »counterparts«, i.e. reading the relation from the »other« side becomes the other relation. One example is the relation types »Consists of« and »Is a part of«.
26.3.1 Addresses
Used when there is a requirement, problem or time that should be targeted at a process or business object.
26.3.2 Is used by
Used when a business object is supporting an activity or process. The opposite relation is Controls.
26.3.3 Is empowered
Used to show that an individual has a position.
26.3.4 Consists of
Used to describe a product structure. The opposite relation is Is a part of.
26.3.5 Defines
Used to describe who has defined a requirement or problem.
26.3.6 Flow
Used to describe information flow and is draw from prerequisites to the process and continues through the improved results of the process.
26.3.7 Is followed by
Used to describe the next event in the form of process/activity/decision from a process or activity when not using business objects as results.
26.3.8 Handles
Used for example to describe that a given organisation or role »handles« a product.
26.3.9 Accountable - rAci
Is one of the »RACI« relations and is used to describe who is accountable for a process or activity.
26.3.10 Informed - racI
Is one of the »RACI« relations and is used to describe receivers of information from a process or activity.
26.3.11 Can play
Used to indicate that an individual can have a given role.
26.3.12 Consulted - raCi
Is one of the »RACI« relations and is used to describe who is consulted when working in a process or activity.
26.3.13 Corresponds with
26.3.14 Requires
Used to show how requirements relate to each other. The opposite relation is Supports.
26.3.15 Is situated at
Used to describe where an object is located.
26.3.16 Interrelates with
Used to describe an unspecified relation between objects. This could be a relation between interested parties or processes etc.
26.3.17 Is specialized in
Used to describe categorizations or kinship. The opposite relation is Is a type of.
26.3.18 Controls
Used in flows where a business object in some way controls a process or activity. The opposite relation is Is used by.
26.3.19 Supports
Used to show how requirements relate to each other. The opposite relation is Requires.
26.3.20 Belongs to
Used for example to show individuals that are part of an organisation.
26.3.21 Responsible - Raci
Is one of the »RACI« relations and is used to describe who is responsible for performing a process or activity.
26.3.22 Is a part of
Used to describe a product structure. The opposite relation is Consists of.
26.3.23 Is a type of
Used to describe categorizations or kinship. For example a car is a kind of vehicle, a quick order is a kind of order. The opposite relation is Is specialized in.